GET STARTED
From FADE IN to final take
Your guide to Cut to Fade 2.0.1.
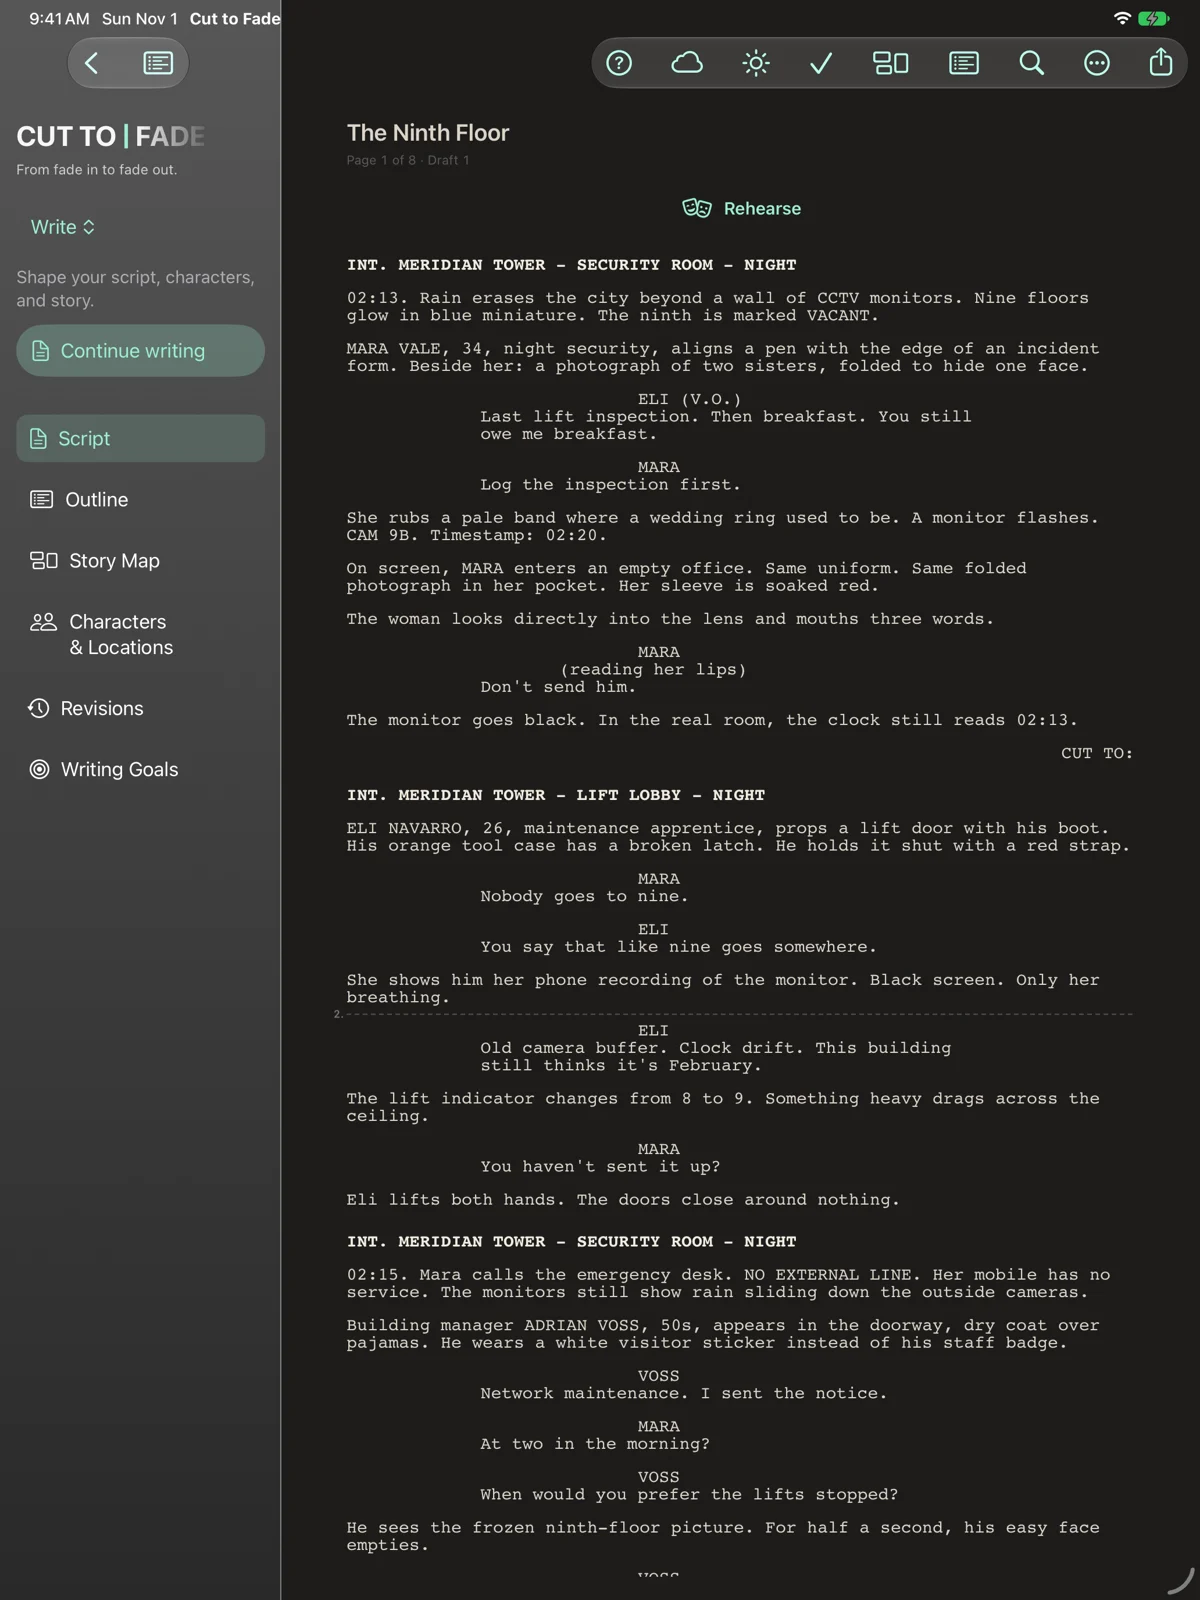
One project, five stages
Write the screenplay, Rehearse the performances, Plan the coverage, organize the Shoot, and Share the right material. Your script connects the tools.
Two different boards
Story Map in Write shapes the story: beats, scenes, arcs and structure. Storyboard in Plan visualizes the shots: panels, compositions, sequences and timing.
Start with the screen you need
Use Workspace on iPhone. On iPad or Mac, choose a stage and tool from the tool menu. The selected scene follows you between scene-based tools.
Back to contentsGET STARTED
Find your way around
The updated menus put each tool in its stage.
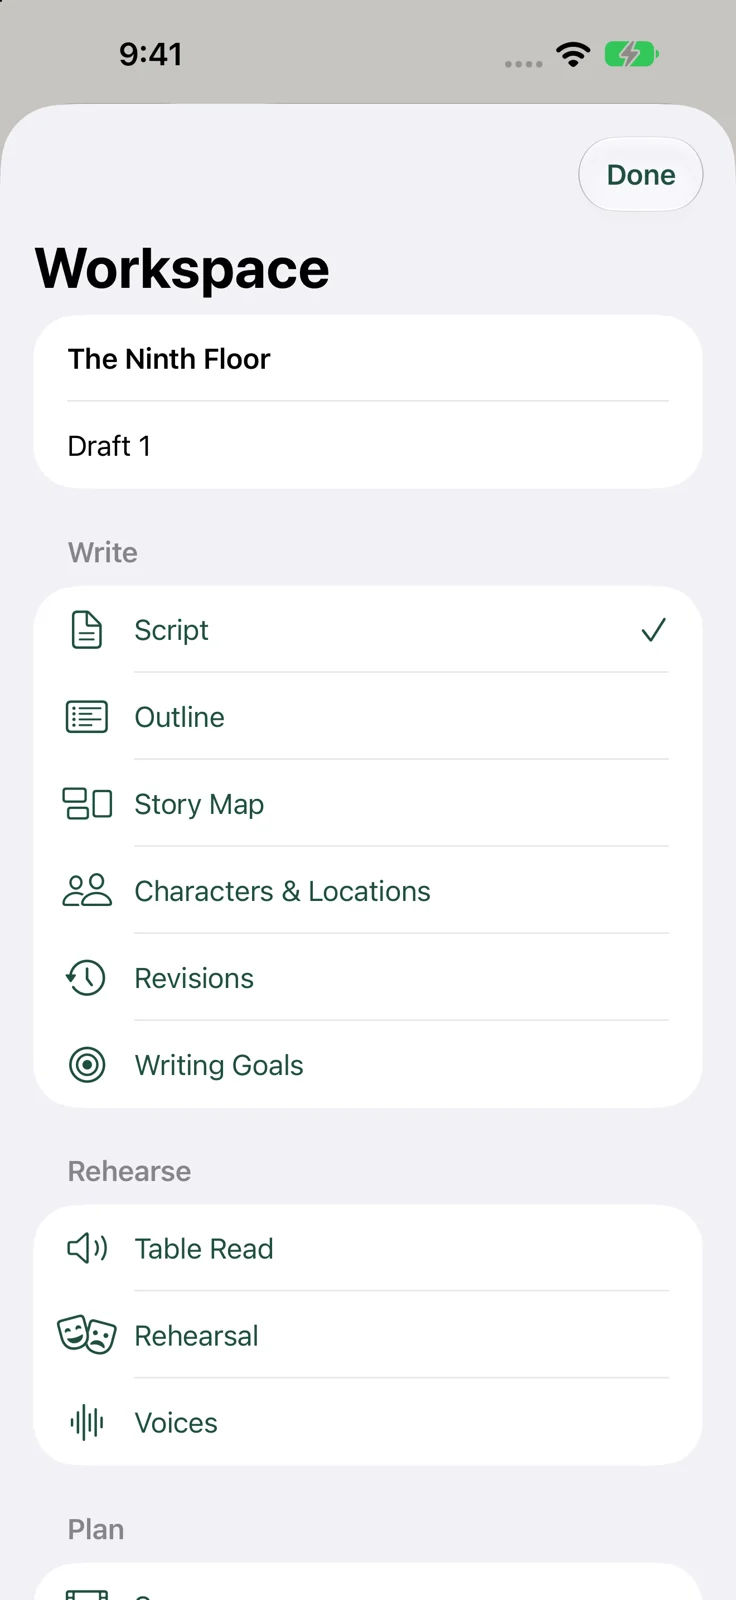
Write and Rehearse
Write contains Script, Outline, Story Map, Characters & Locations, Revisions and Writing Goals. Rehearse contains Table Read, Rehearsal and Voices.
Plan and Shoot
Plan contains Scenes, Breakdowns, Locations, Shot List, Blocking, Storyboard and Viewfinder. Shoot contains Schedule, Shot Progress, Continuity and Take Log.
Share
Share contains Script Export, Send to Co-Writer, Sides, Crew Packets and Take Export.
Show or hide the tools
On iPhone, tap Workspace. On wider screens, Show tool menu and Hide tool menu make room for the work. Workspace options provides another route on Mac and when the iOS tool menu is hidden.
Back to contentsGET STARTED
Your first ten minutes
Go from a new script to a planned scene.
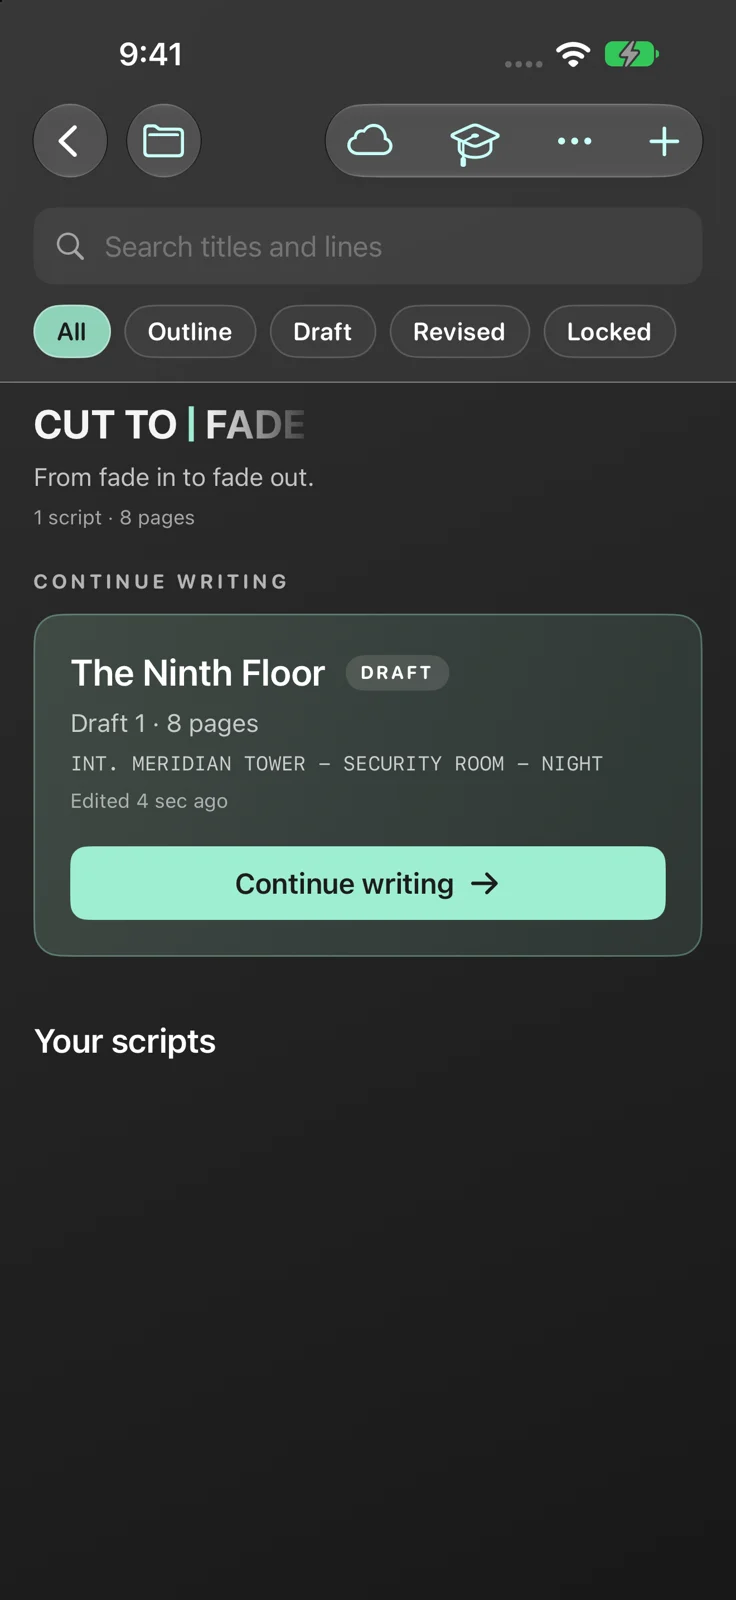
1 / Start a script
In the library, choose New Script and a blank script or template. Add a title and open the editor.
2 / Write a scene
Begin with an INT. or EXT. scene heading. Add action, a character cue and dialogue. Use the format controls to correct a paragraph type.
3 / Hear the scene
Choose Rehearse > Table Read, assign voices and press Play. Choose Rehearsal to perform one character yourself.
4 / Plan the coverage
Choose Plan > Shot List or Storyboard and add a shot to the scene. With Pro, open Blocking to place the cast, cameras and lights.
Back to contentsGET STARTED
Bring your work with you
Import, organize and recover scripts.
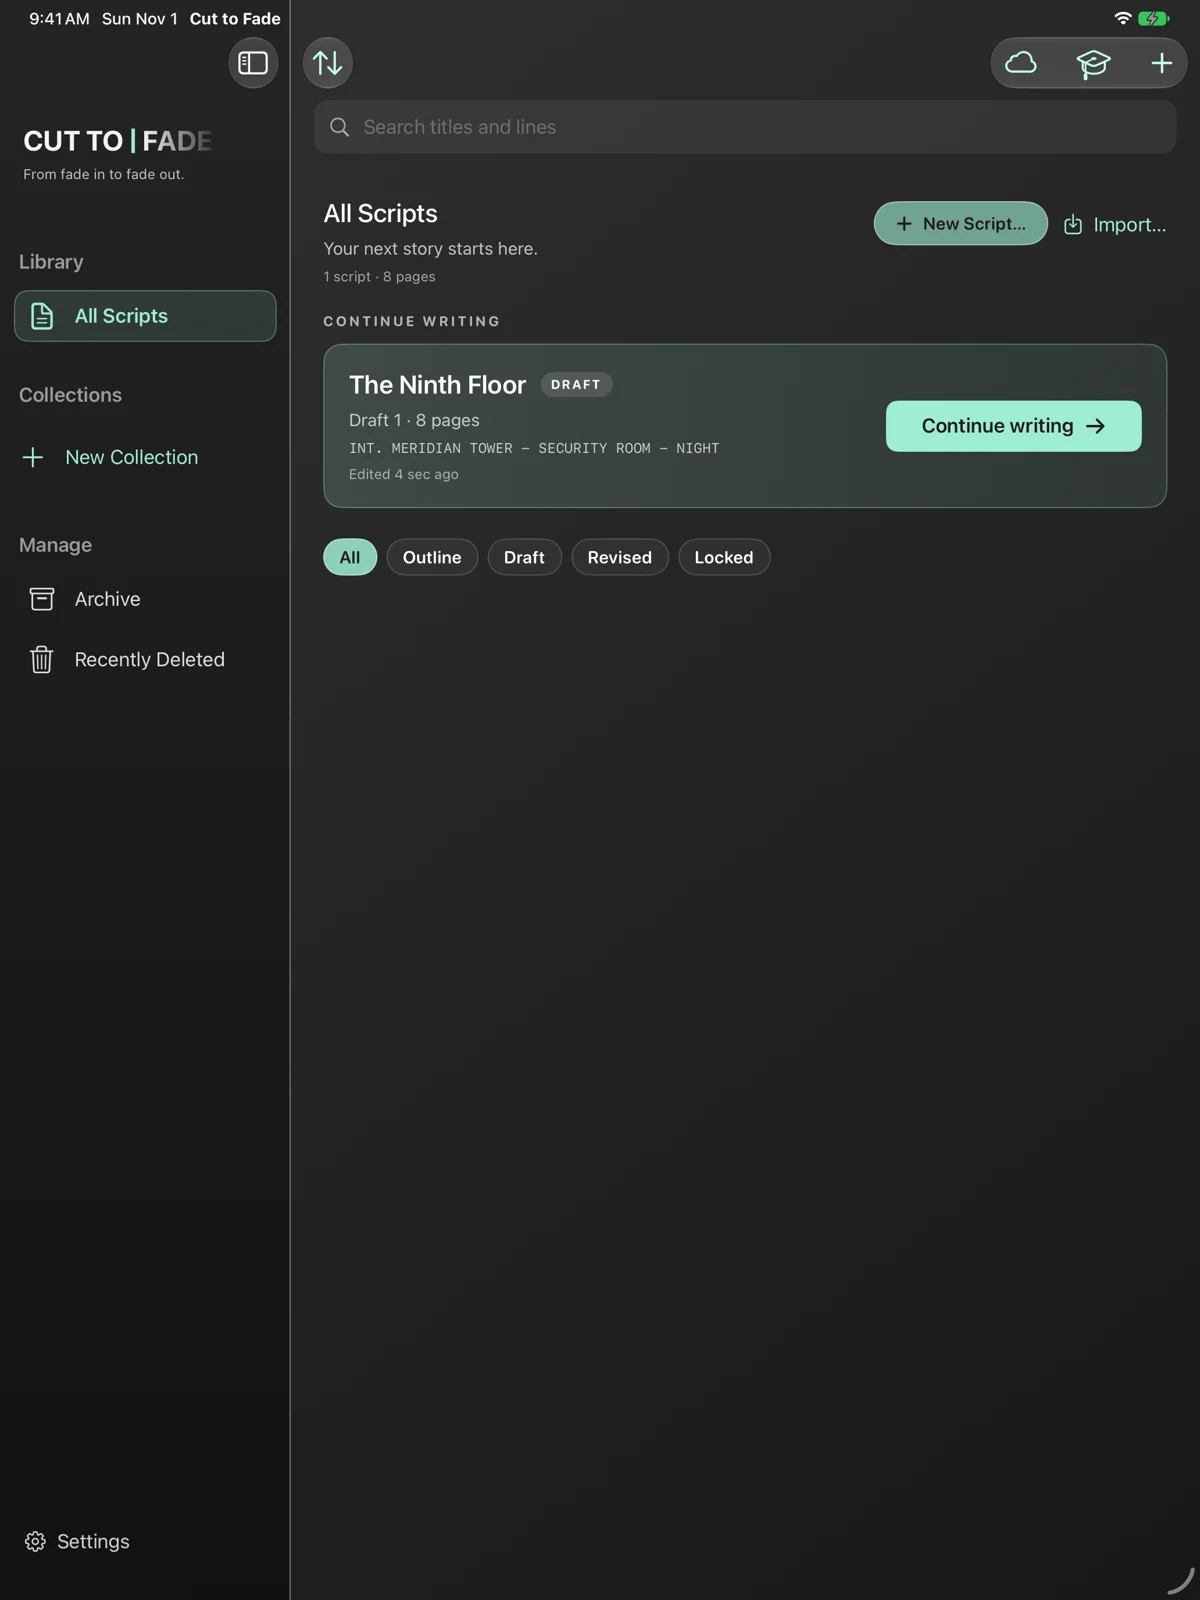
Import a screenplay
Choose Import in the library or File > Import on Mac. Fountain and Final Draft preserve screenplay structure. Review PDF imports for line types and page artifacts.
Organize the library
Pin important work, use status filters and collections, and archive completed projects. Search can find titles and script text.
Restore a deletion
Recently Deleted keeps deleted work for 30 days. A deletion can sync to your other devices, so restore a mistake before that period ends.
Keep a milestone copy
Create drafts for rewrites and export a project package for a separate archive. An exported copy is useful before major production changes.
Back to contentsWRITE
Write on iPhone
A screenplay editor that travels with you.
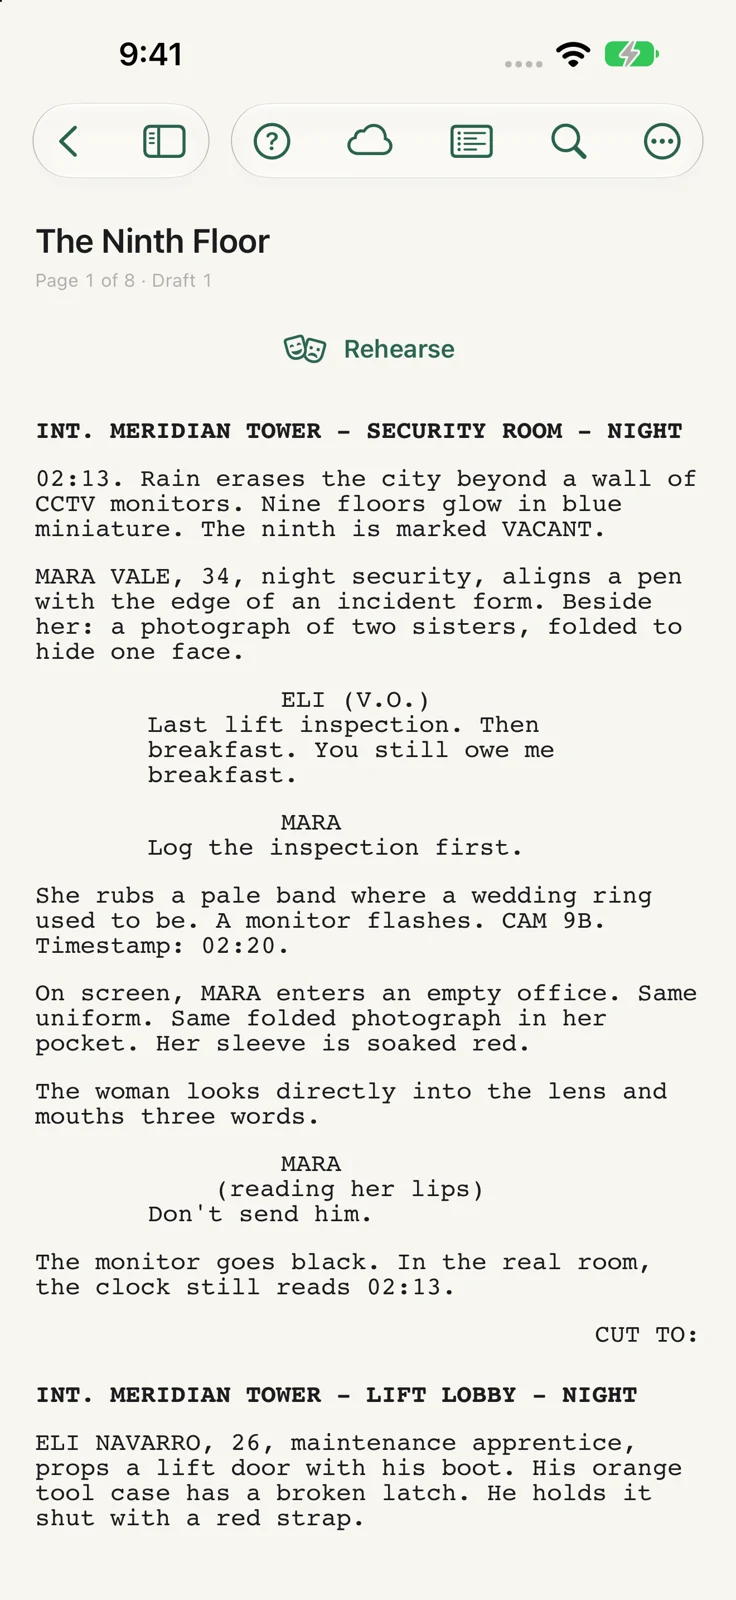
Choose the element
Tap into the page and use Scene, Action, Character, Parenthetical, Dialogue or Transition. The format control changes the current paragraph type.
Keep the flow
Return after a character cue moves to dialogue. Return after a speech moves to action. Character suggestions reuse names already in the script.
Revise the passage
Select text, paste a passage, or use Find & Replace. Review smart-paste formatting when bringing in text from another app.
Set the title page
Tap the title to edit the title page and logline. The page count follows the same pagination used for screenplay PDF output.
Back to contentsWRITE
Write with a keyboard
Use the menu bar and familiar shortcuts.
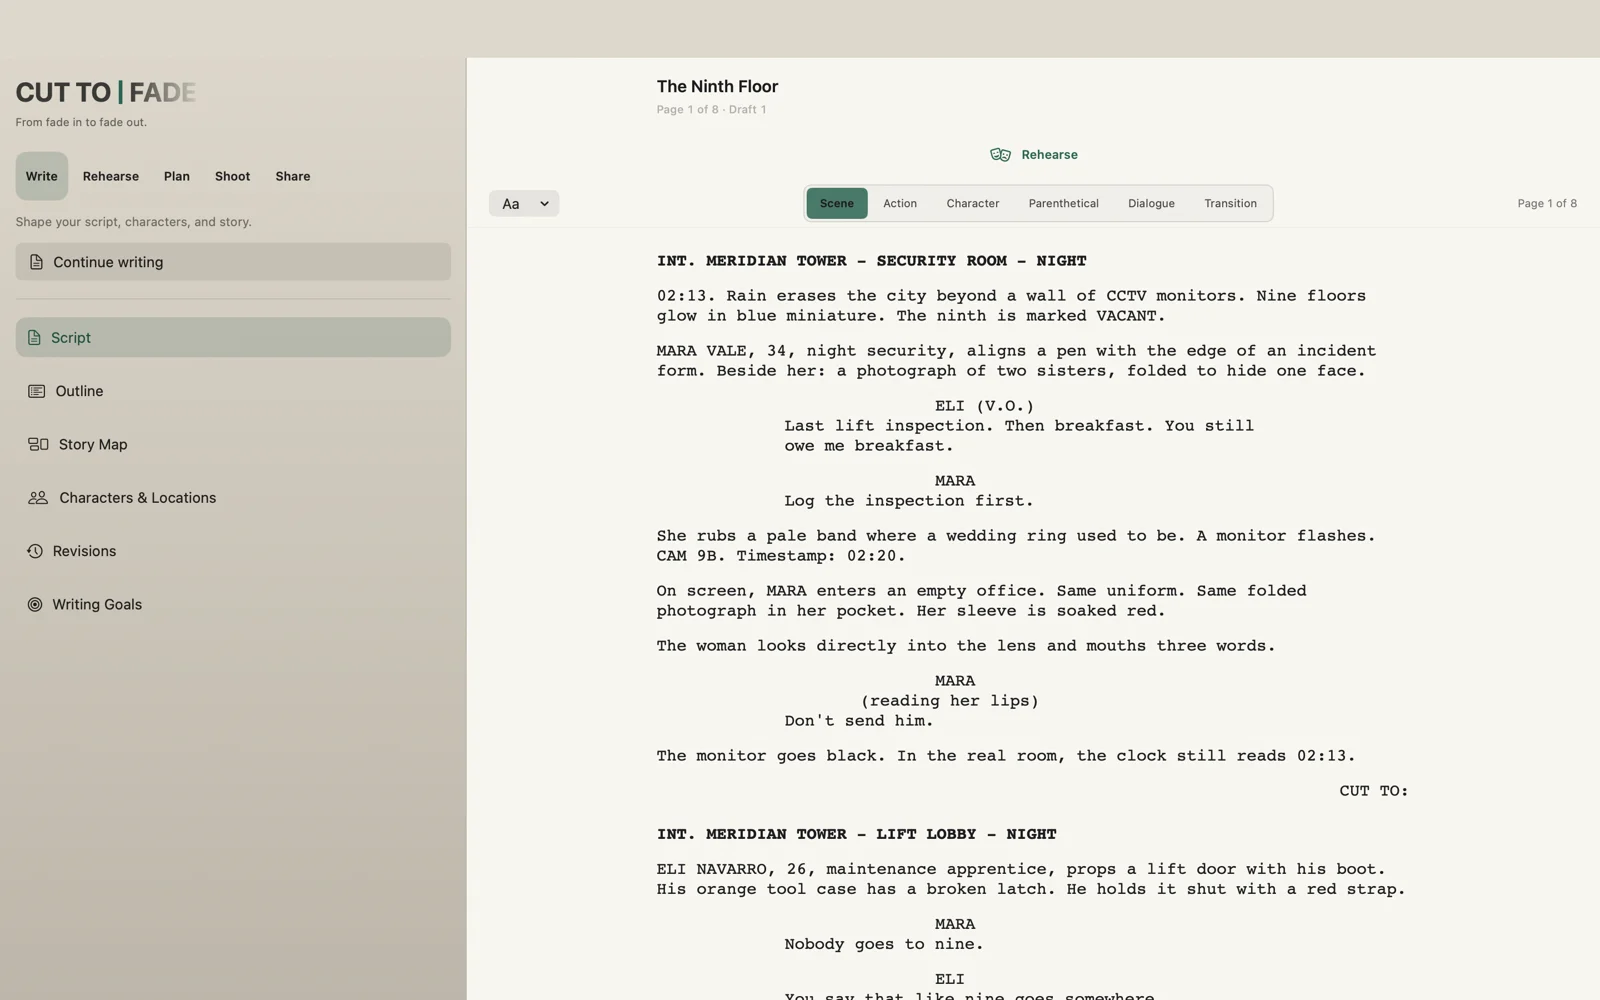
Format quickly
Command-1 through Command-6 choose screenplay element types in order. Tab cycles types and can complete an unambiguous character name.
Move between tools
Command-F opens Find. Option-Command-O opens Outline. Shift-Command-B opens Story Map. Shift-Command-T opens Title Page.
Manage files
Command-N creates a script. Shift-Command-O imports. Command-E exports PDF; Shift-Command-E exports Fountain. Exports use the Mac Save panel.
Find more shortcuts
The Mac menu bar lists commands and shortcuts. On iPad with a hardware keyboard, hold Command to see available actions.
Back to contentsWRITE
Daylight or late night
The interface and writing page have separate choices.
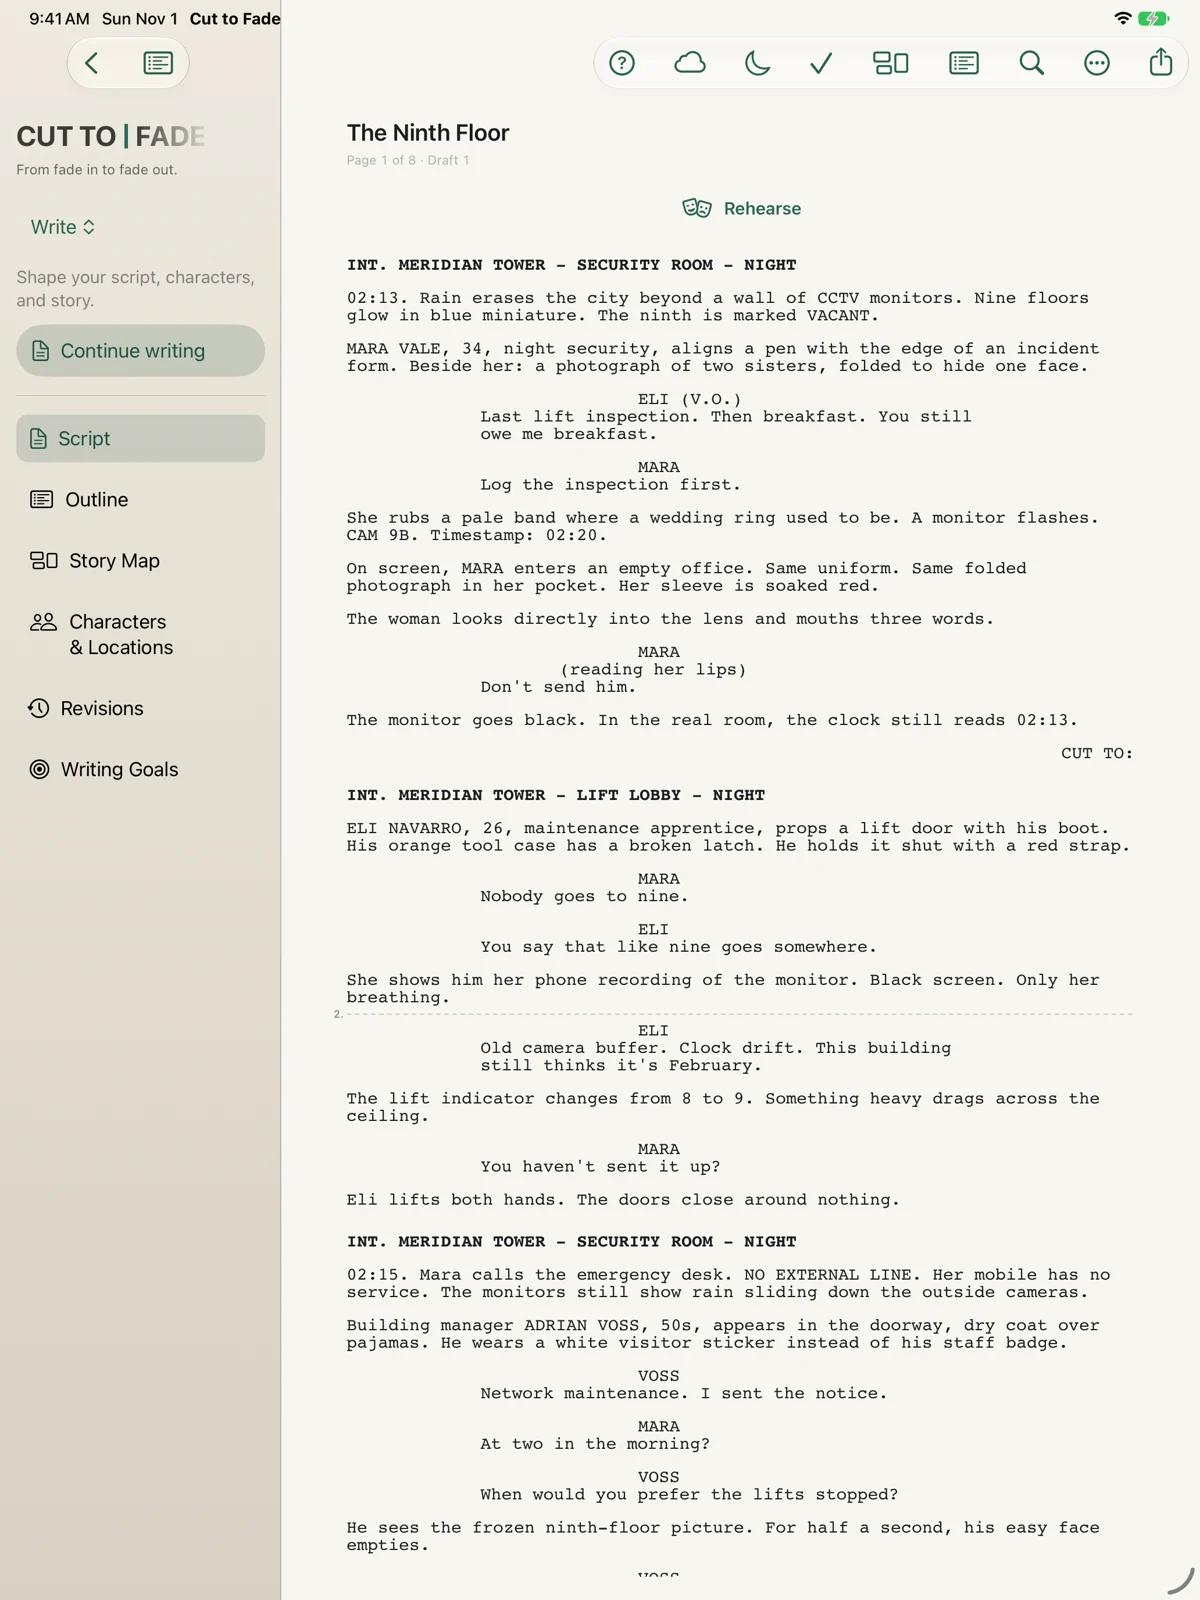
Choose the interface
Use the app appearance that suits your workspace. Day mode has warm paper tones; dark mode uses charcoal and mint.
Choose the writing page
Settings offers Match System, Paper and Night for the editor page. The editor also provides a page-appearance control; placement varies with available space.
Keep exports consistent
Paper and Night affect reading on your device. Exported screenplay PDFs keep black text on white paper.
Back to contentsWRITE
Keep the story in view
Outline makes the screenplay easier to navigate.
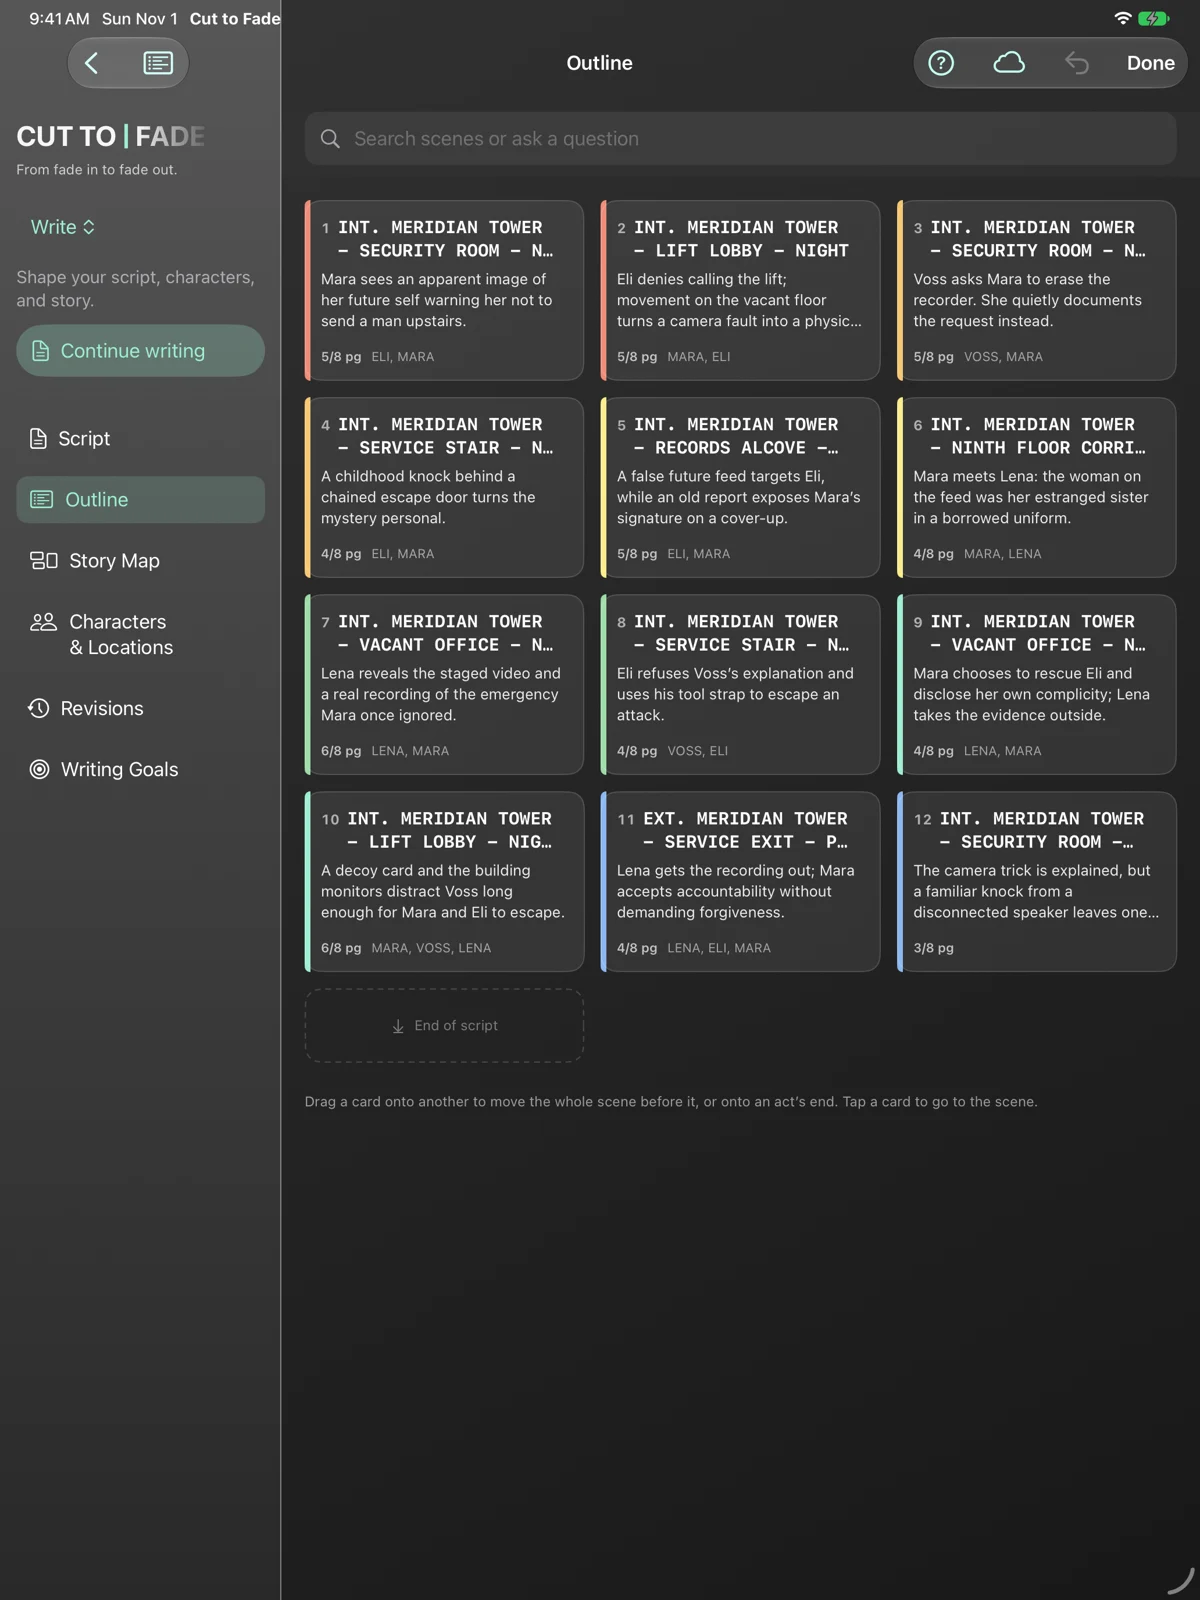
Read the shape
Choose Write > Outline. Scene cards show the heading, synopsis, length and speaking characters. Acts group the cards.
Rearrange scenes
Move scene cards to change screenplay order. Use a card menu to edit its synopsis or color, move it up or down, or mark an act start.
Track the structure
Writing Goals compares your page targets with the draft. Templates can provide an initial act structure.
Keep details connected
Scene synopsis and color are shared with Story Map and scene navigation. Update them once and use them throughout the project.
Back to contentsWRITE
Shape the Story Map
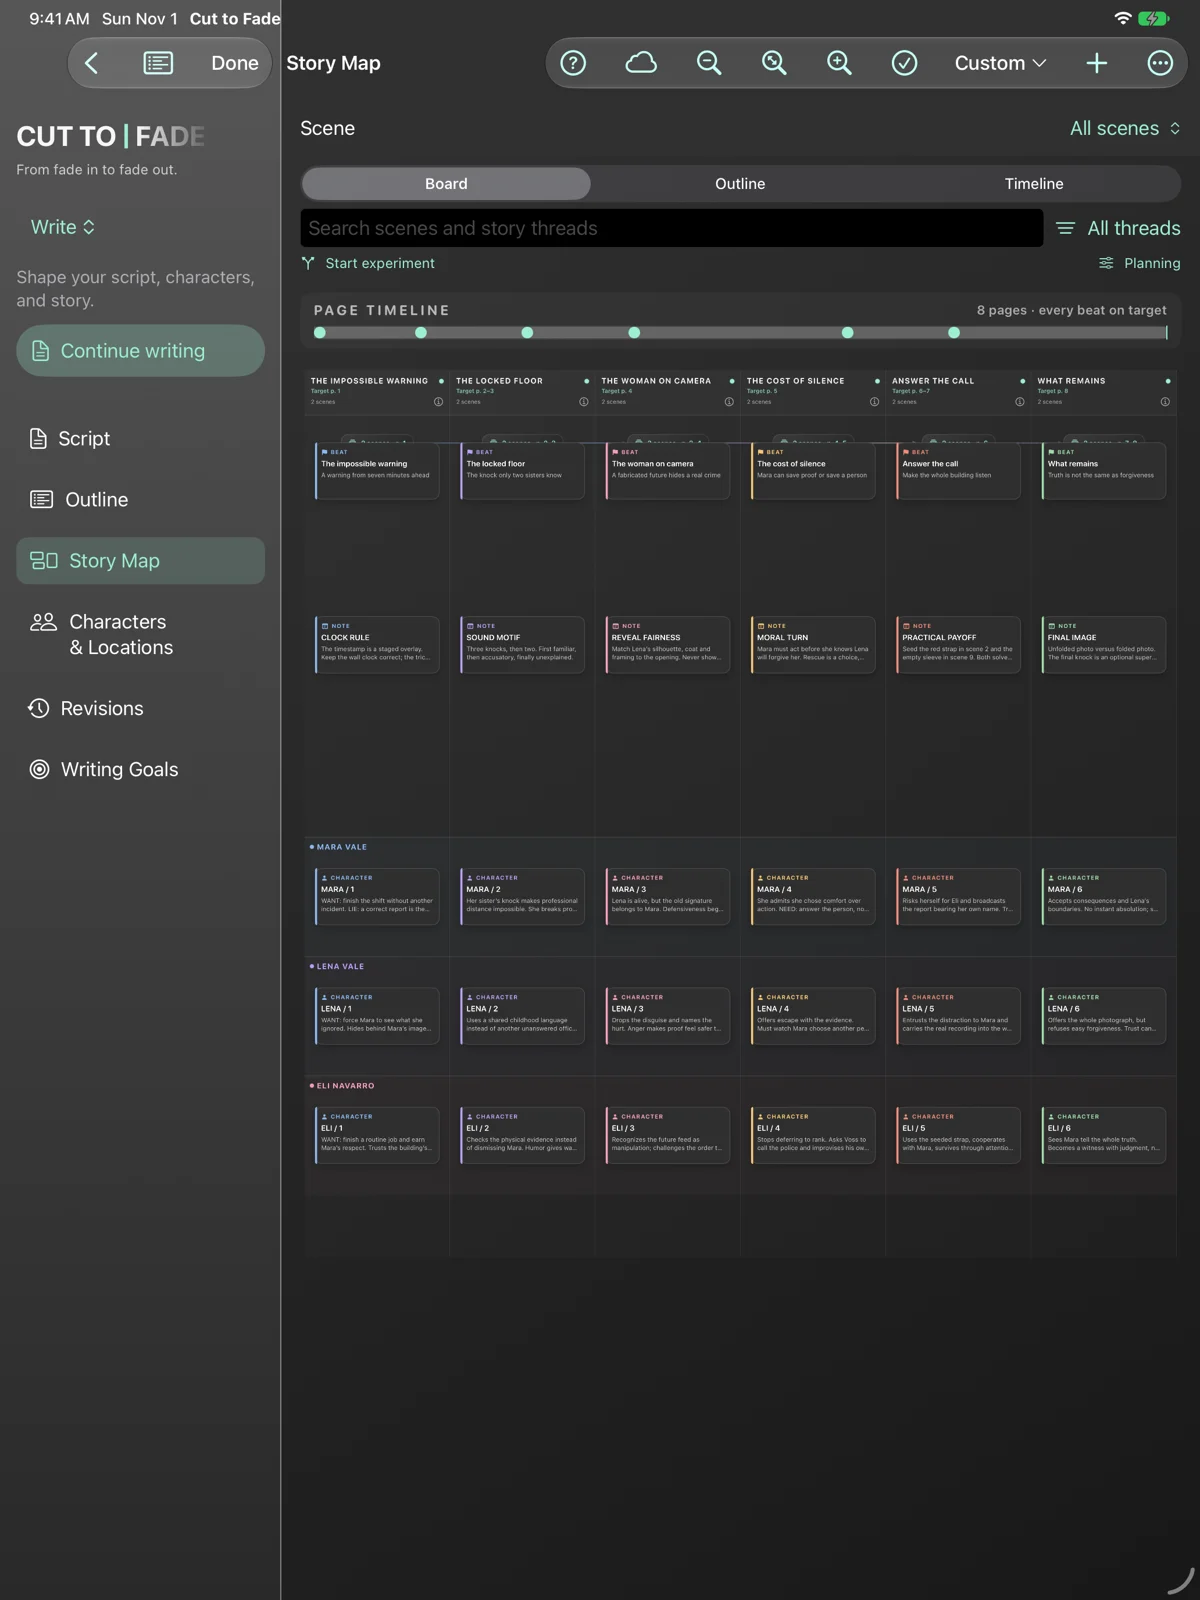
Plan story structure in Write > Story Map.
Pick a view
Switch between Board, Outline and Timeline. Compact screens start in Outline; choose the view that suits the work.
Arrange the story
Use scene, beat, note and character cards. Normal scene-card reordering also changes the screenplay. Use Undo if the result is not what you intended.
Follow an arc
Search scenes and story threads, or filter by thread. Record a scene's goal, conflict, turn and outcome, plus planned pages and tension.
Choose a framework
Three-Act is included free. Pro adds further frameworks and Custom beats, character lanes, references, photos, the page timeline and beat-sheet PDF.
Back to contentsWRITE
Try another story order
Explore changes before applying them to the script.
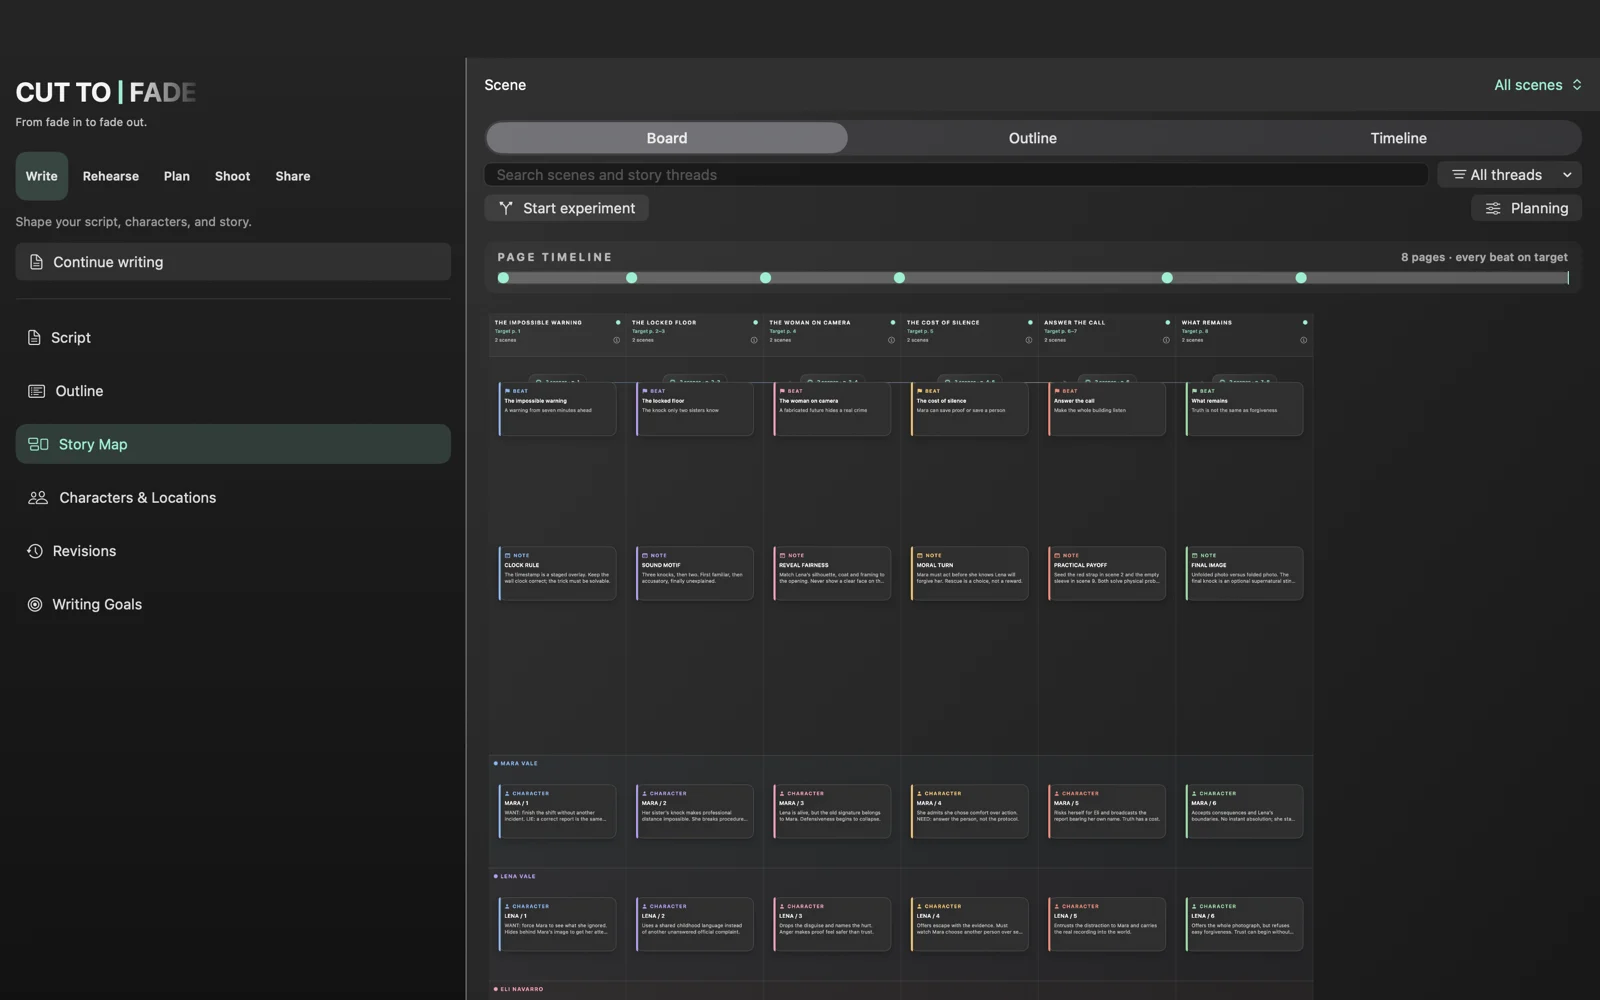
Start an experiment
In Story Map, choose Start experiment before moving scenes. The map saves the starting arrangement and keeps experimental reorders out of the screenplay.
Review and apply
Choose Review order to inspect the proposed scene order. Apply commits it to the screenplay; Discard experiment arrangement returns to the earlier arrangement.
Save a useful version
Open Planning, enter a version name and choose Save current arrangement. Saved arrangements can be inspected and restored.
Keep loose ideas
Planning also has an Idea parking lot for scene ideas, dialogue, research and images. These ideas stay outside the screenplay and its page count.
Back to contentsWRITE
Follow threads and payoffs
Give each scene a purpose.
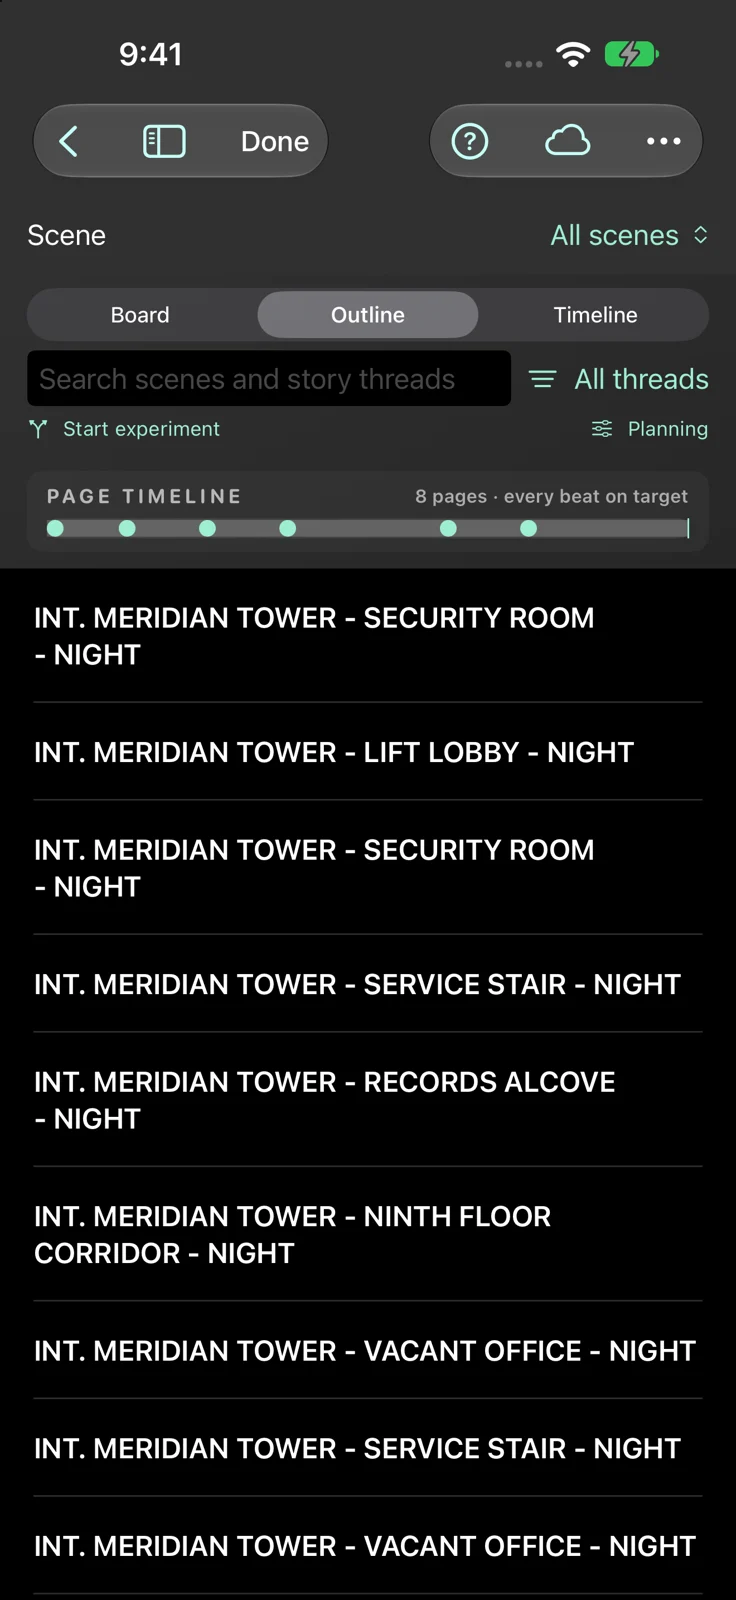
Describe the scene
Use the scene purpose controls to record goal, conflict, turn and outcome. Add story-thread names that let you follow a character or theme.
Watch the pacing
Compare planned and actual pages and record a tension level. Use these as prompts for your own editorial judgment.
Track setups
Record a setup and the scene where it pays off. Planning lists unresolved setups so you can review missing connections.
Ask for a story review
On supported Apple Intelligence devices, Planning > AI story review offers notes linked to evidence in the screenplay. Open the referenced scene and decide what to change yourself.
Back to contentsWRITE
Know your characters
Profiles connect the page to performance.
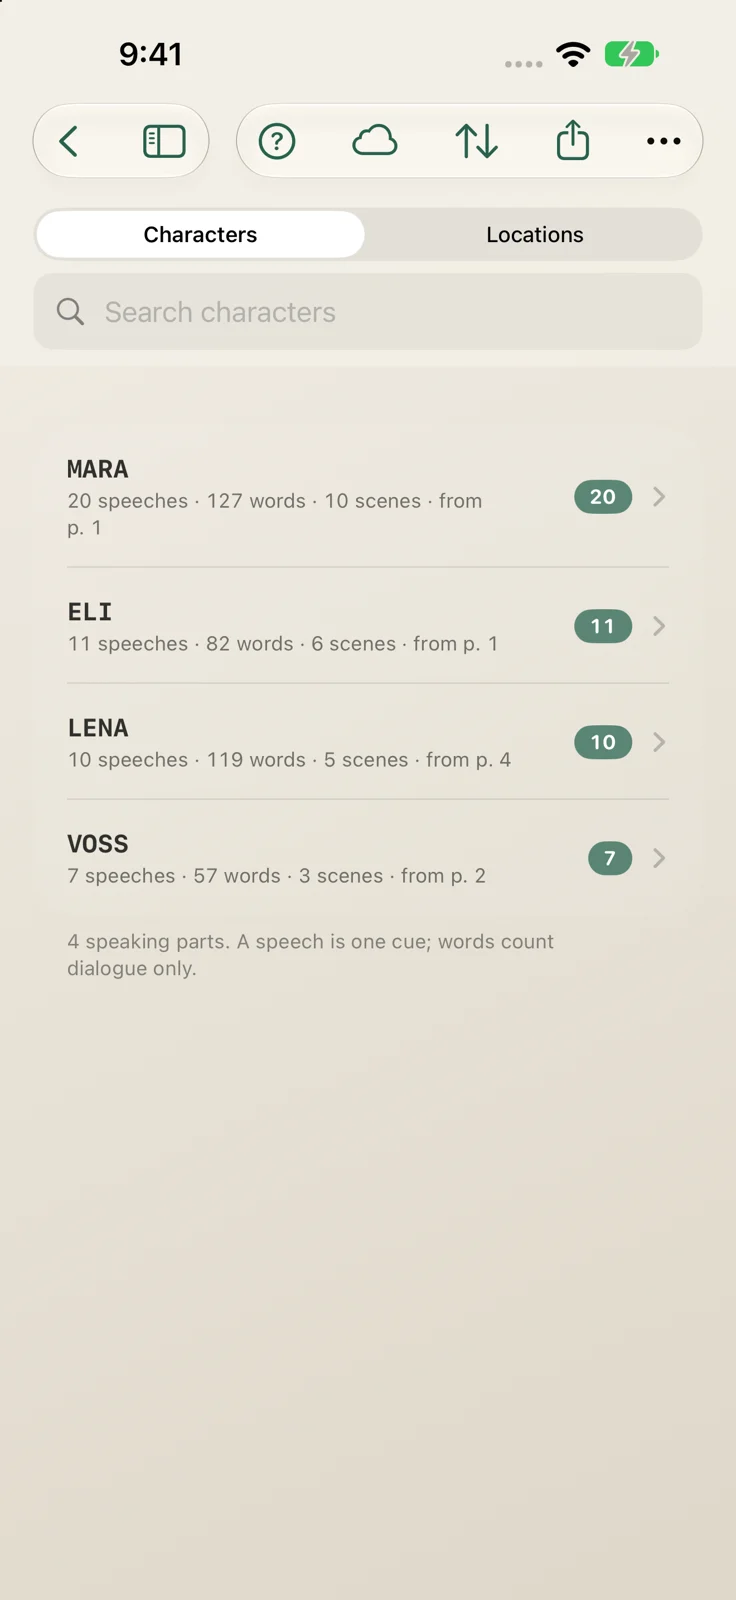
Open the index
Choose Write > Characters & Locations and select a character. The app draws scene and dialogue information from the screenplay.
Develop the role
Add a description, age, arc, relationships and a photo. Review speeches, word counts, first appearance and shared scenes.
Rename consistently
Use Rename Character or Location to make a coordinated change. Review the proposed count and any name-merge warning before confirming.
Carry the role forward
Profiles follow the script family across drafts. Accepted natural-voice choices can travel with the project.
Back to contentsWRITE
Protect the rewrite
Use drafts, revisions and production review.
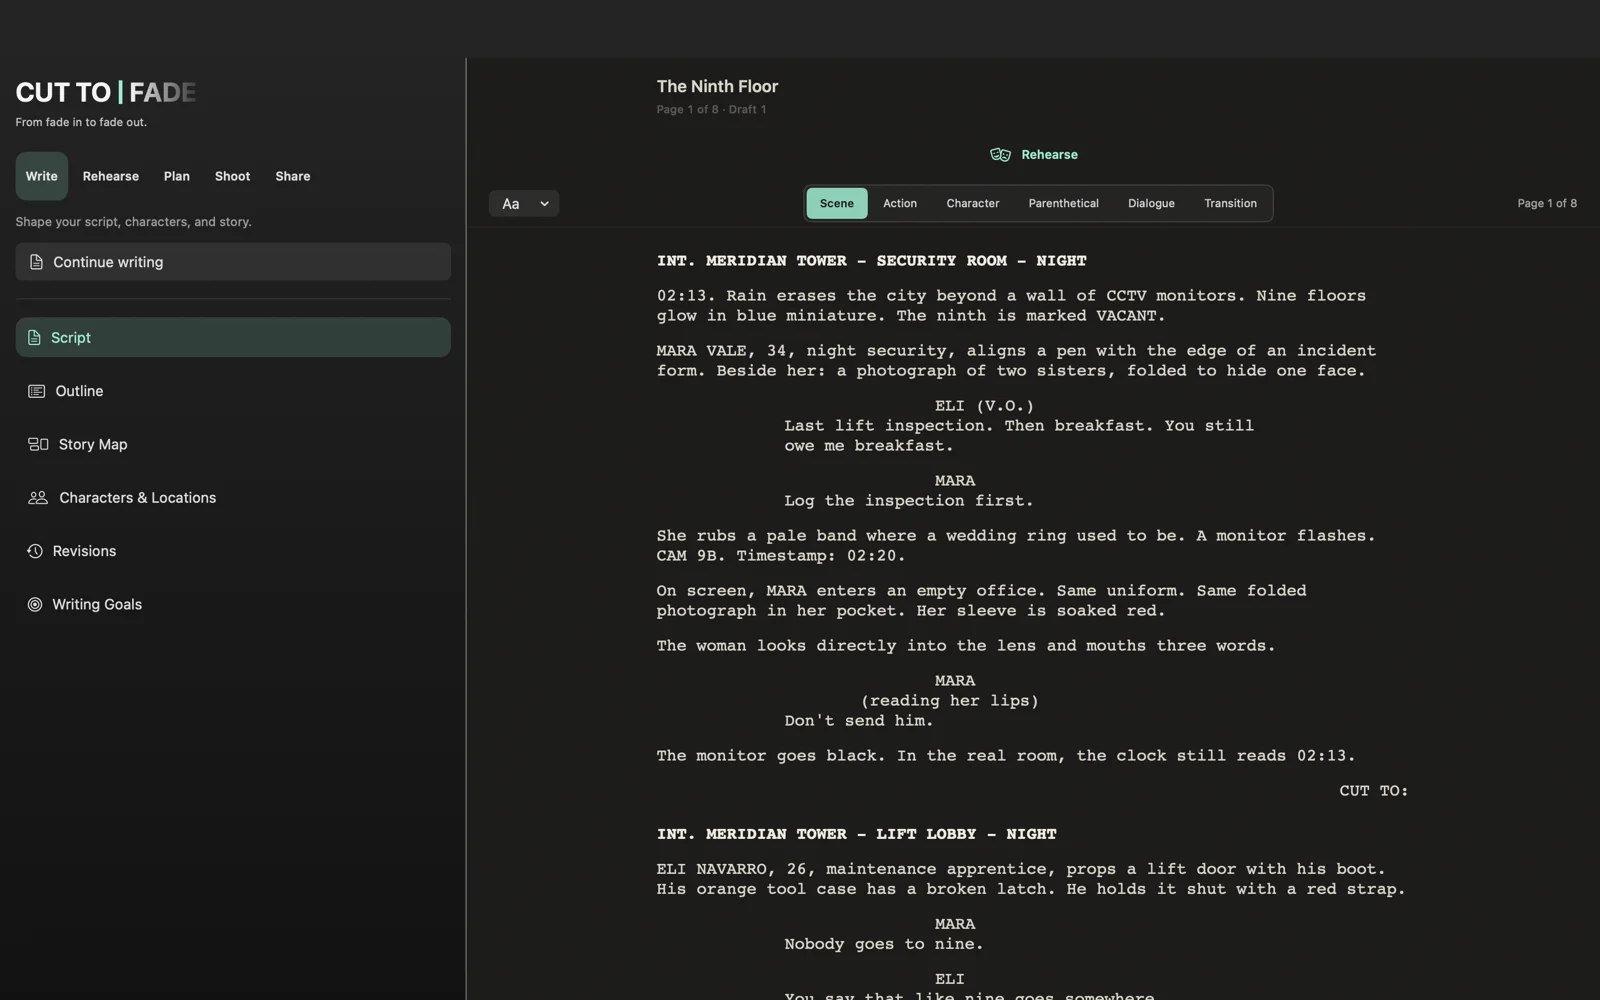
Make a milestone
Create a new draft before a substantial rewrite. Use Revisions and comparison tools to inspect changes while retaining a reference copy.
Lock for production
Locked scene numbering preserves existing numbers. Inserted scenes can receive lettered numbers, and omitted scenes retain their place.
Review changed plans
After script edits, production tools can flag scenes that need review. Recheck their coverage and notes before marking the plans reviewed.
Export the handoff
At important milestones, save a project package and the screenplay PDF the crew should use. Label the intended draft clearly.
Back to contentsREHEARSE
Hear the screenplay
Listen in Rehearse > Table Read.
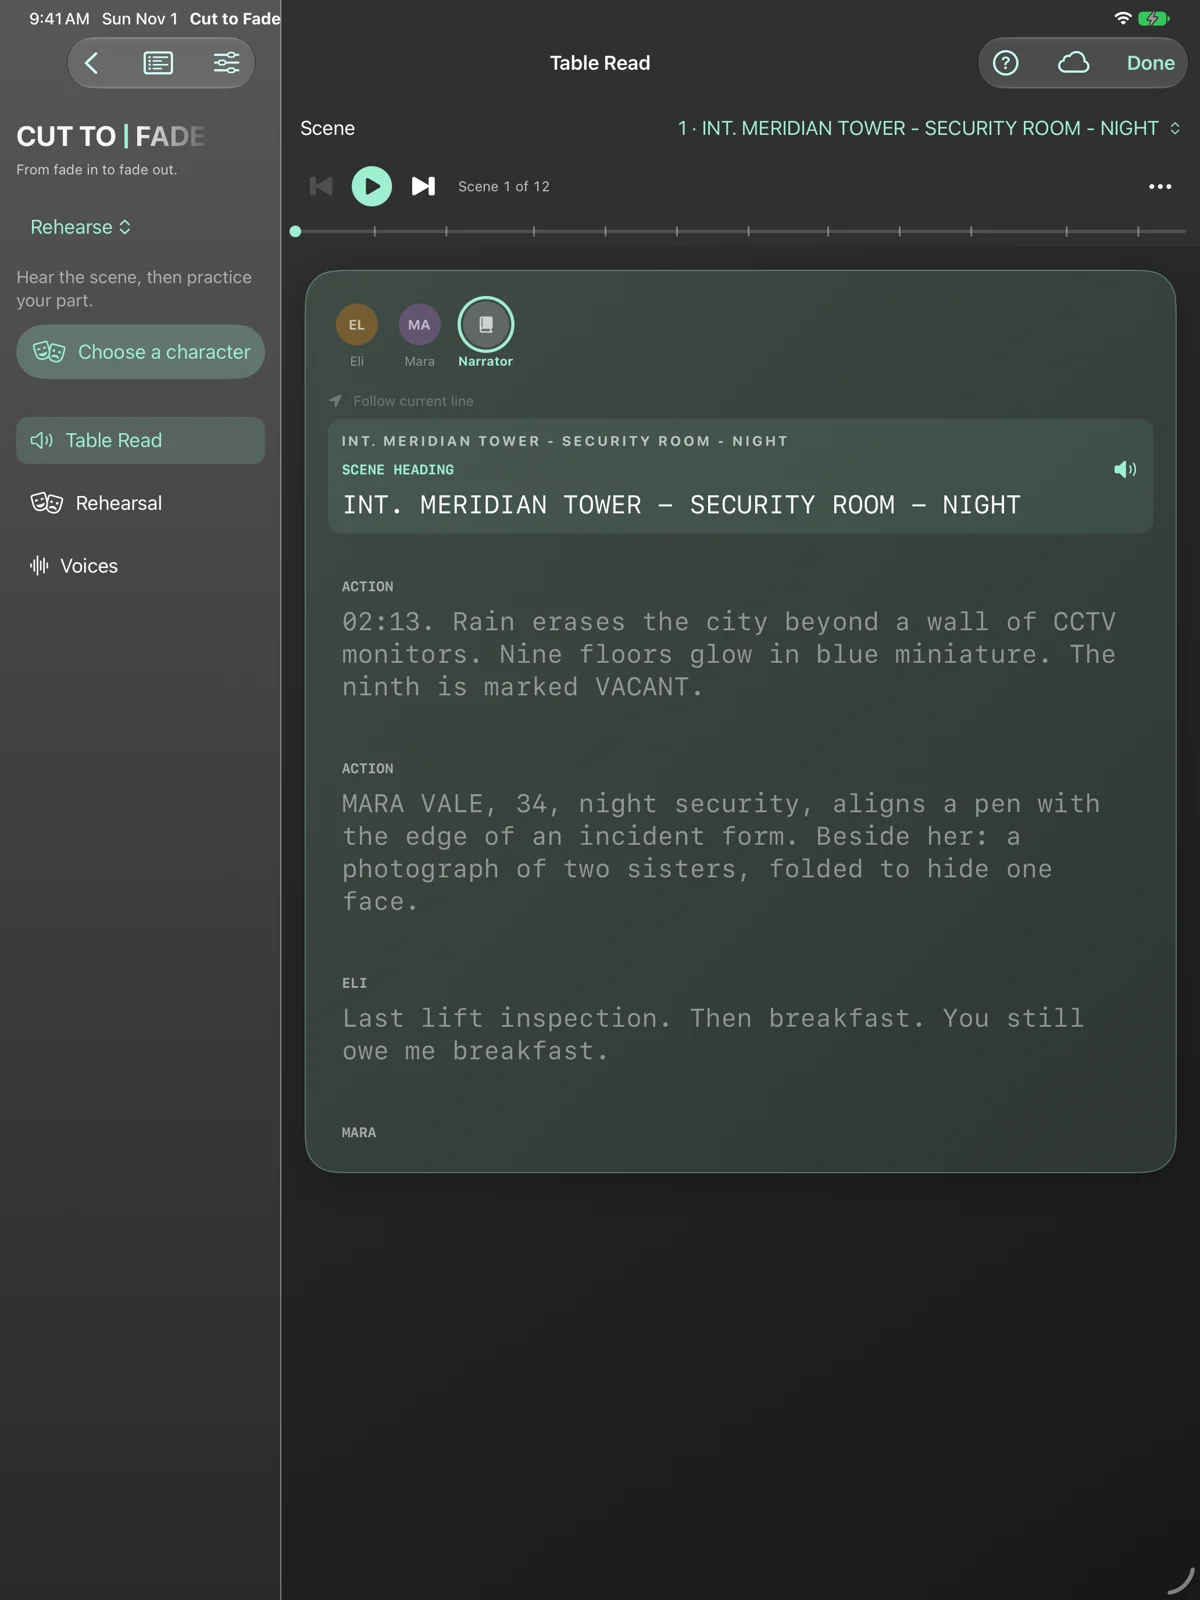
Start a read
Choose voices and press Play. Use the playhead and scene navigation to move through the material.
Choose what is spoken
Listening settings control scene headings, action, parentheticals and transitions. Adjust speed to suit the read.
Keep your place
Table Read remembers its position. Choose a selected scene or Start at Cursor when you deliberately want a different starting point.
Use delivery suggestions
Supported on-device AI can suggest delivery for undirected dialogue. Written directions take priority; explicit results are remembered for later reads.
Back to contentsREHEARSE
Practice your part
Let the app read the other characters.
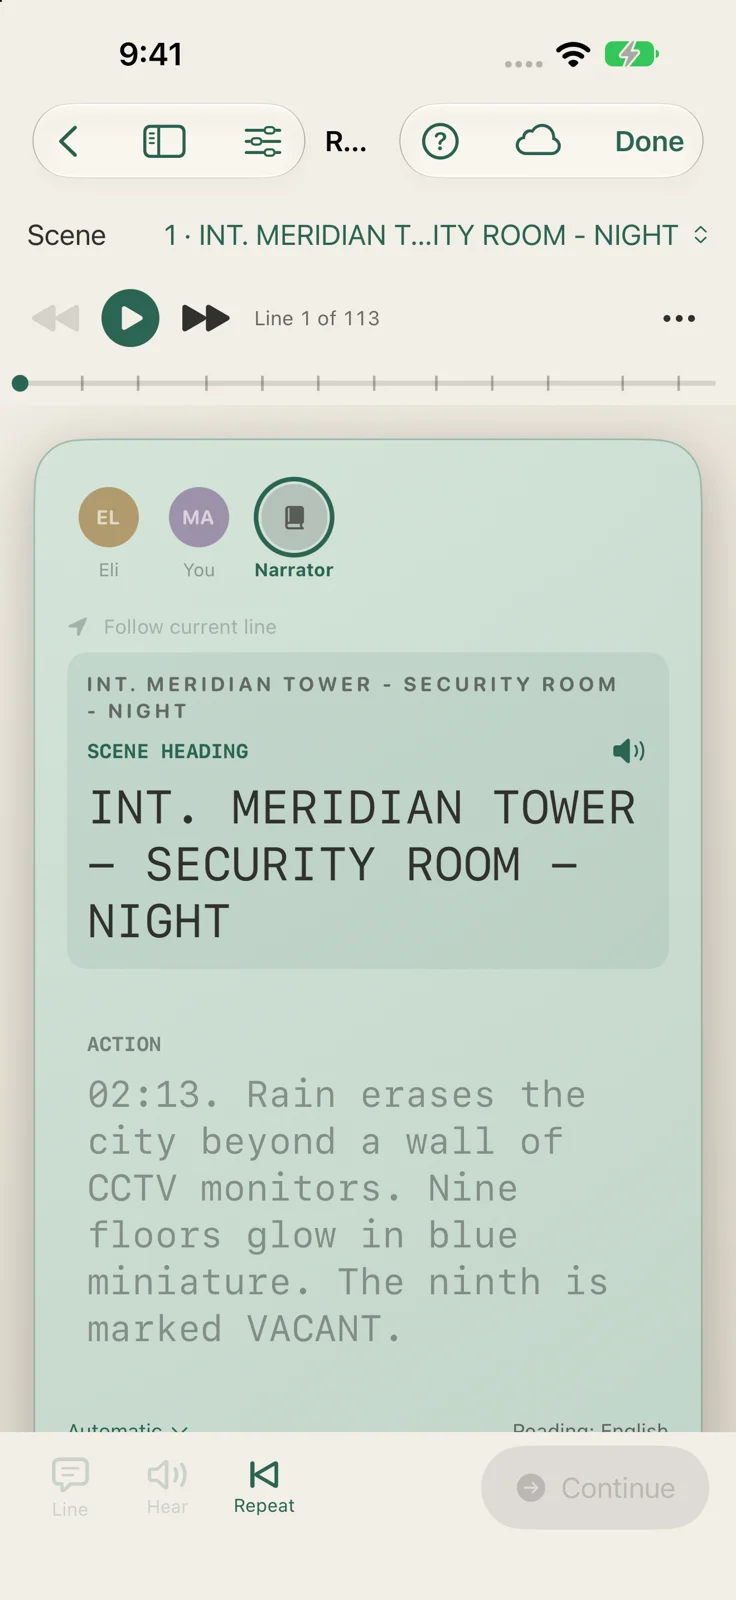
Choose your role
Open Rehearse > Rehearsal and select My character. Start the scene and perform your lines at your turn.
Use a prompt
Line gives a hint, Hear plays your line, Repeat returns to the exchange, and Continue advances. Reveal a line when you need the full text.
Choose the pace
Tap to continue is free. Pro adds Timed pause and Listen and advance, hidden or fading lines, and section loops.
Target another pass
Use line-learning progress and missed-line practice to revisit hints, reveals and skips.
Back to contentsREHEARSE
Prepare voices and record takes
Cast the read, then review your performance.
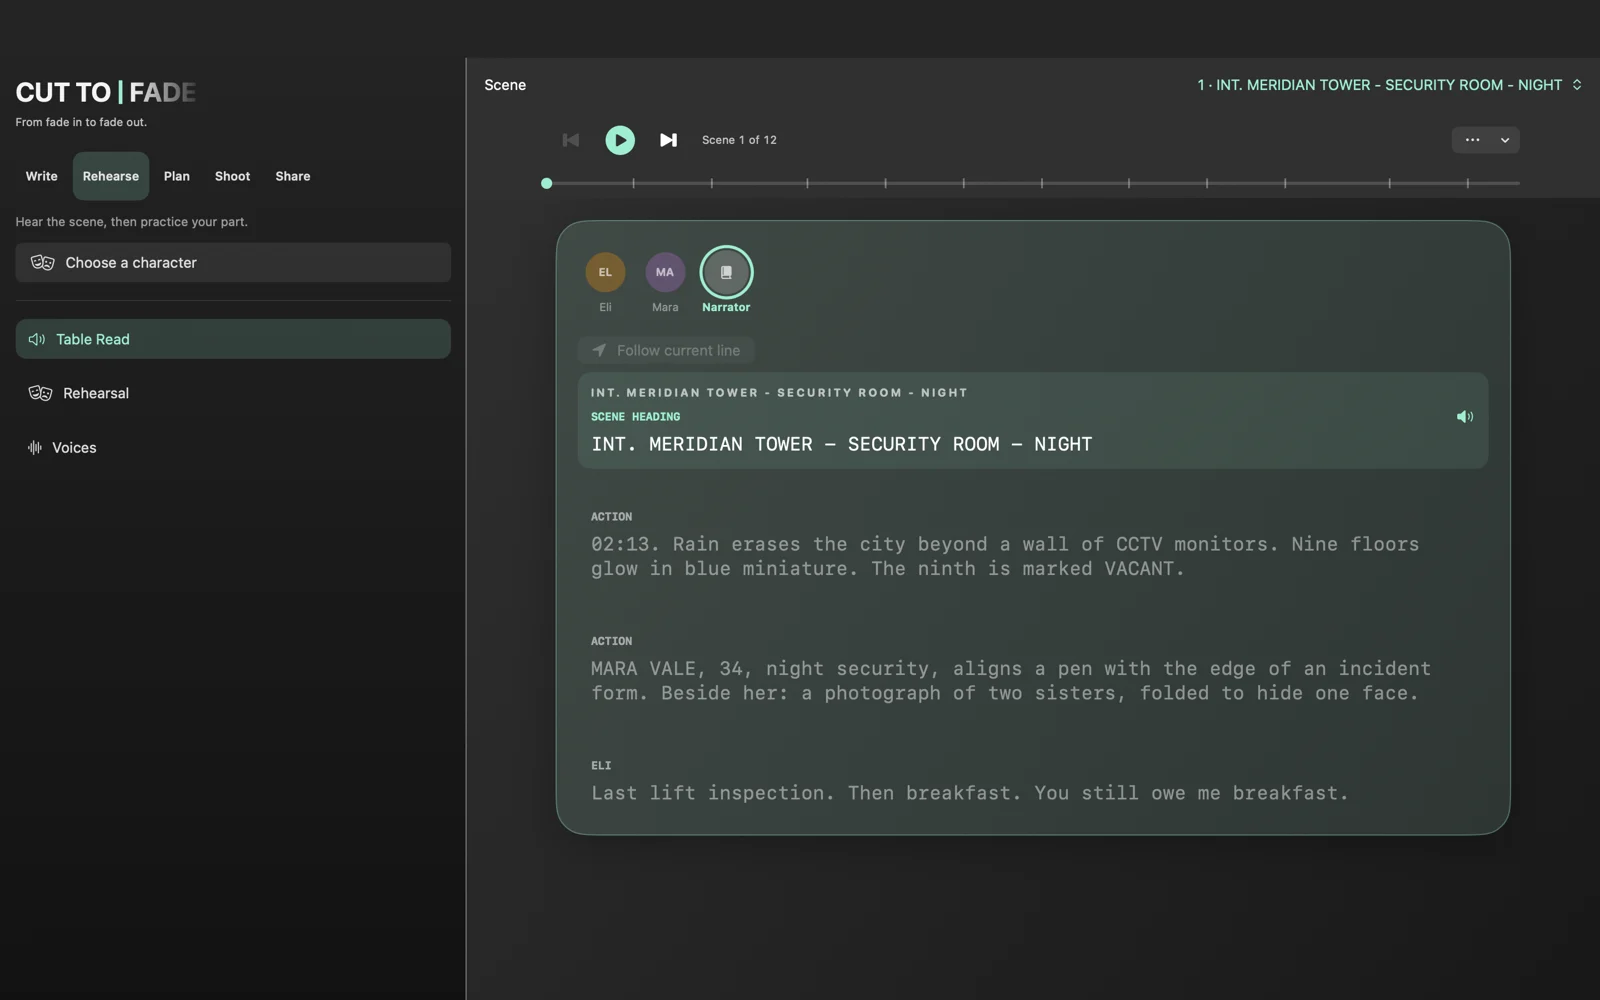
Cast the voices
Rehearse > Voices offers system voices and supported offline natural voices. Heart and Michael are free; Pro opens the full natural-voice catalog and language controls.
Prepare before leaving
Allow natural speech to finish preparing while the app is open. Background preparation depends on hardware and system support.
Export the read
With Pro, export the script, scene or selected section as M4A audio. Check voices, delivery and pauses before sharing.
Review your performance
Rehearsal can record your turns and make a captioned scene clip from your takes. Recorded rehearsal takes remain on the device.
Back to contentsREHEARSE
Rehearse from your wrist
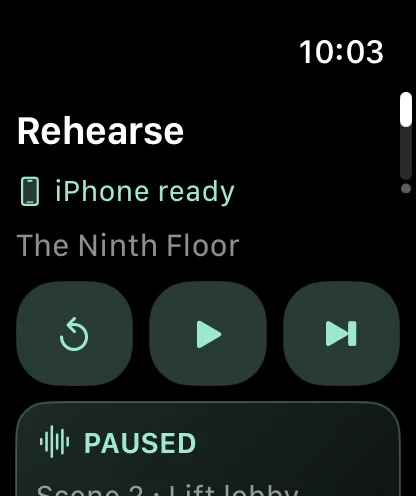
Apple Watch follows the paired iPhone.
Set up on iPhone
Open Table Read or Rehearsal and choose the role and voices there. Open Cut to Fade on your paired Apple Watch.
Control the scene
The Rehearse page offers play/pause, replay current line, next cue and a three-second countdown. Tap the cue to read it in a scrolling sheet.
Use silent cues
Enable Silent cues for wrist feedback at an actor turn or countdown completion. Keep the Watch app active during rehearsal.
Read the status
Updates paused means the Watch is showing its last update. Open the iPhone app and use Refresh to restore live controls.
Back to contentsPLAN
Start with the scene
Connect the screenplay to its production plans.
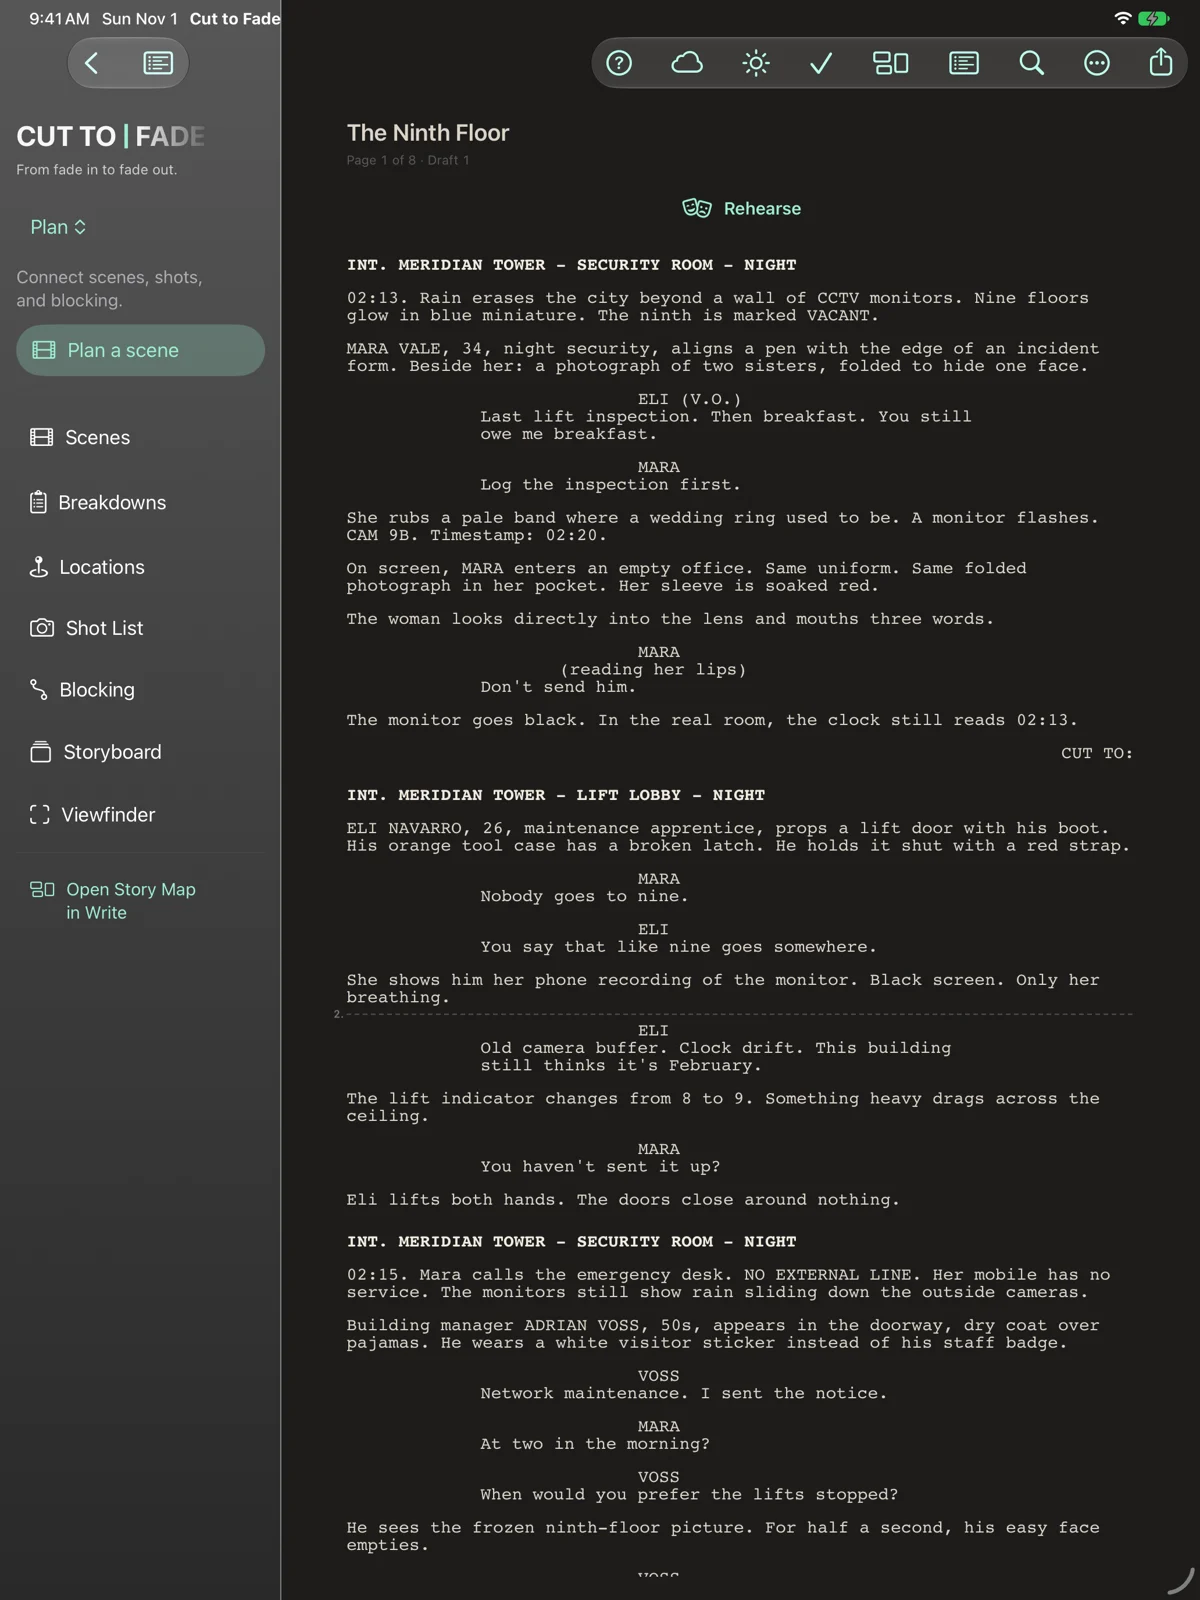
Open Plan > Scenes
Choose a scene to review its text, shots and blocking together. Scene selection follows you into related tools.
Build the coverage
Open Shot List to describe framing, movement and lens choices. Open Storyboard to make visual panels for those same shots.
Stage the action
Open Blocking for cast, set pieces, cameras and lighting. Link cameras to shots so planned coverage stays connected.
Review after changes
Use changed-scene indicators to revisit plans after a rewrite. Confirm the right scene before adding production information.
Back to contentsPLAN
Plan the coverage
Keep the visual intention beside each shot.
Create a shot
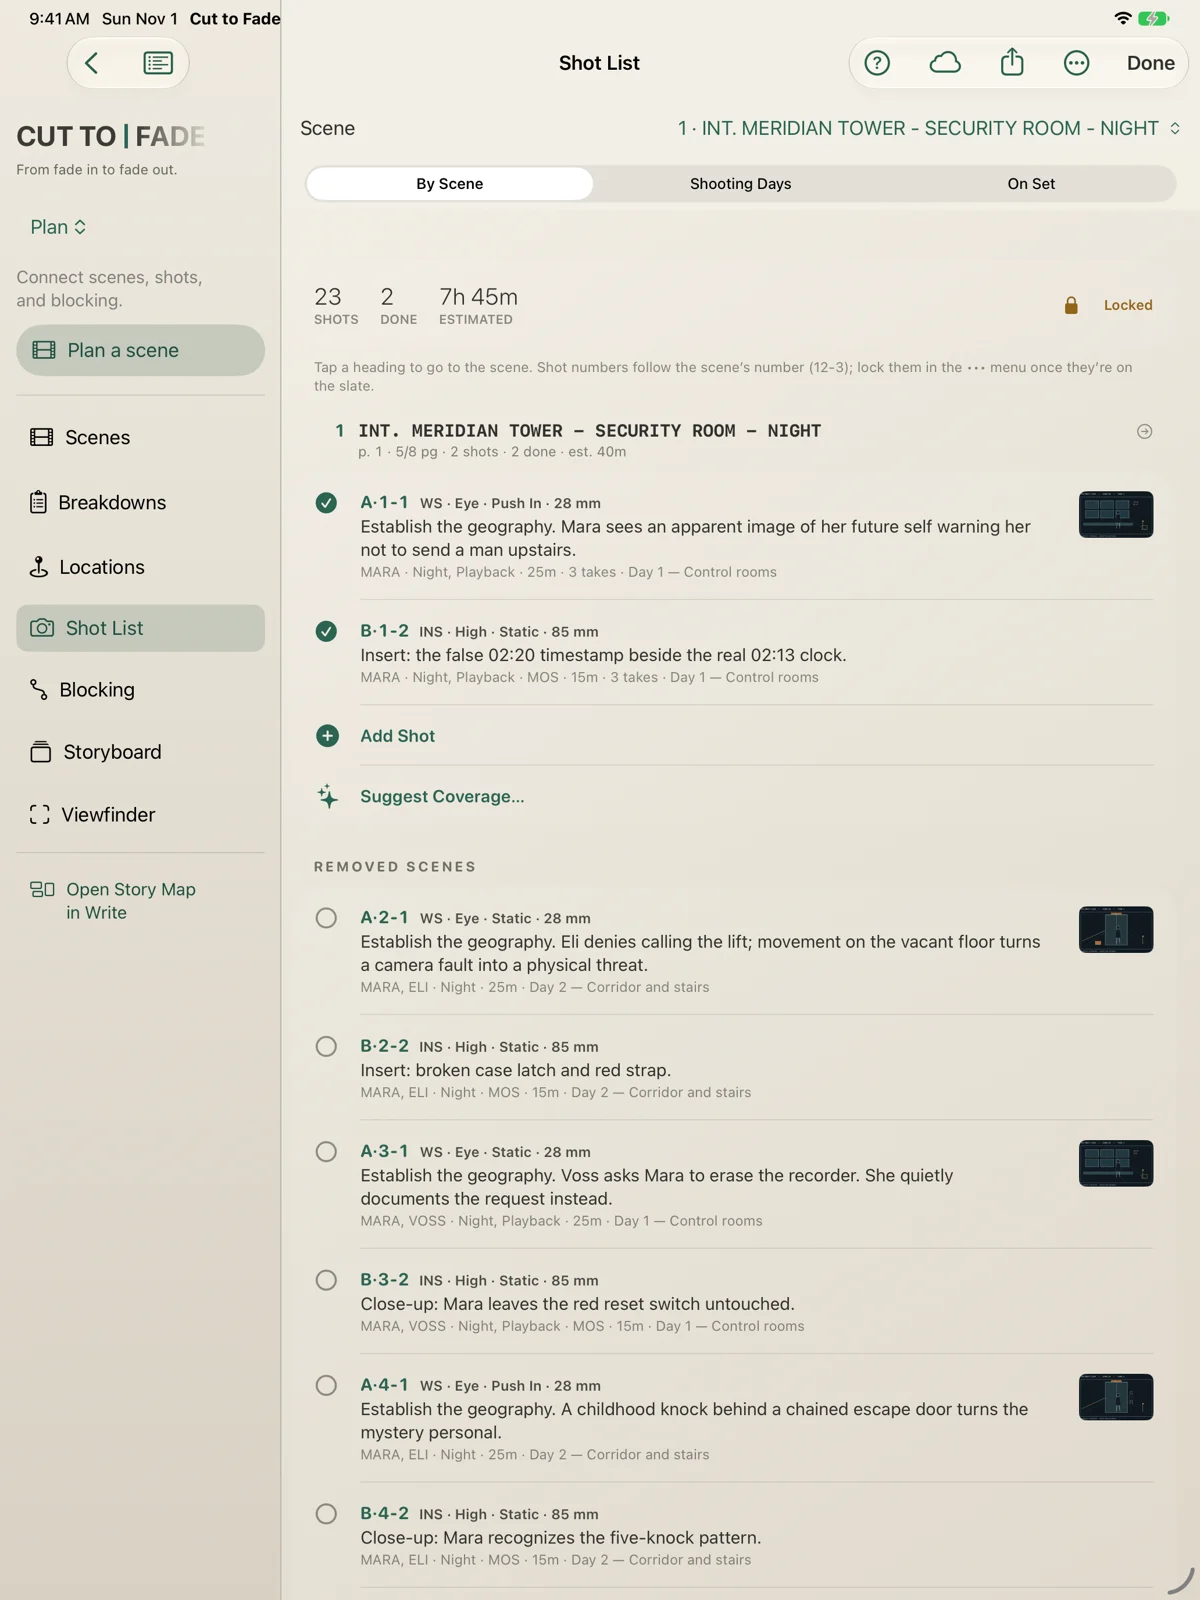
Choose Plan > Shot List, select a scene and add coverage. Record the description, framing, angle, movement, lens and notes.
Add visual references
Attach a reference image, storyboard panel or viewfinder still to explain the composition. The same shots appear in Storyboard.
Organize the shoot
Group shots into shooting days and review coverage. Shot Progress later tracks Planned, Ready, Shot and Needs pickup.
Keep the groupings clear
Shot-list shooting days organize shots. Schedule organizes screenplay scenes. Review both when planning the production day.
Back to contentsPLAN
Build the visual Storyboard
Turn shots into panels in Plan > Storyboard.
Begin with a shot
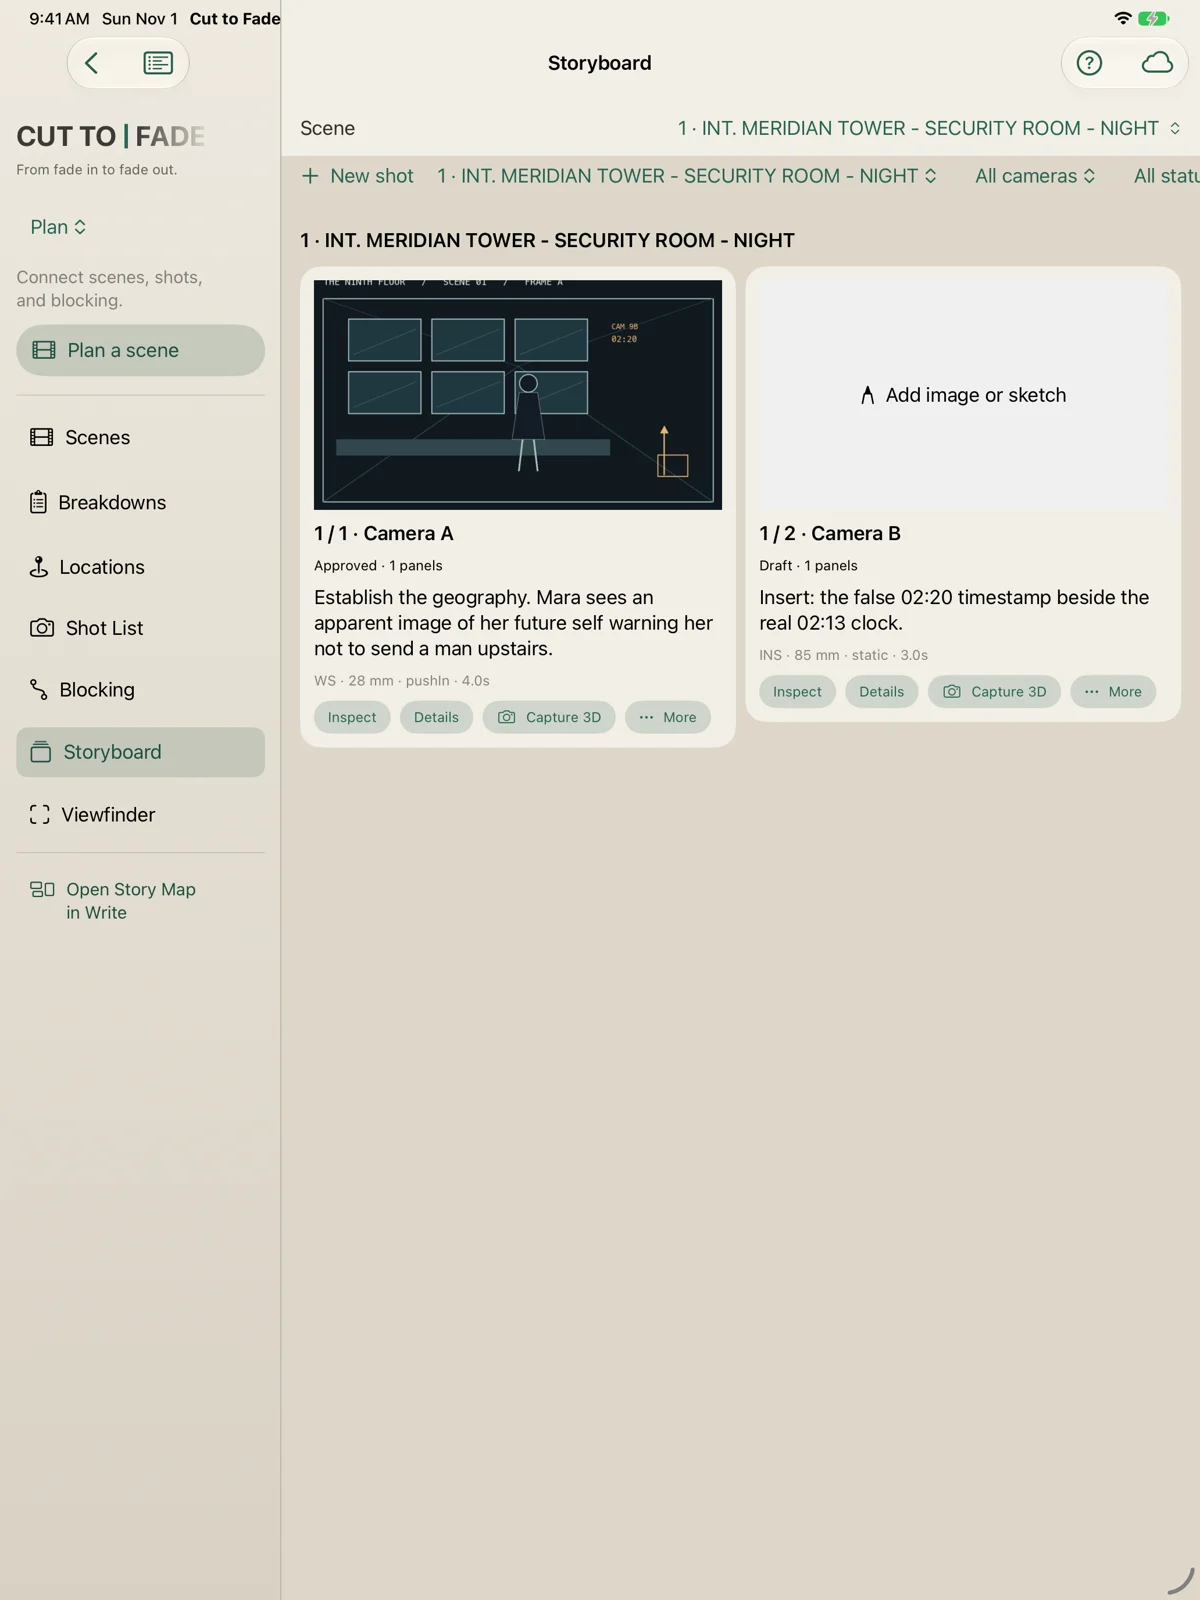
Choose New shot and its scene, or use shots already in Shot List. Both tools show the same coverage.
Make the panel
Tap a panel to add an image or sketch. Import a photo, reuse a project image, or use Capture 3D to capture a blocking camera.
Describe the frame
Set the ratio and duration, then add action, dialogue, screen direction and eyeline notes. Draw annotations to show motion or emphasis.
Review the board
Filter by scene, camera or status. Group by Scene, Location or Shooting day, or switch to Filmstrip.
Back to contentsPLAN
Add movement and alternatives
A shot can contain more than one panel.
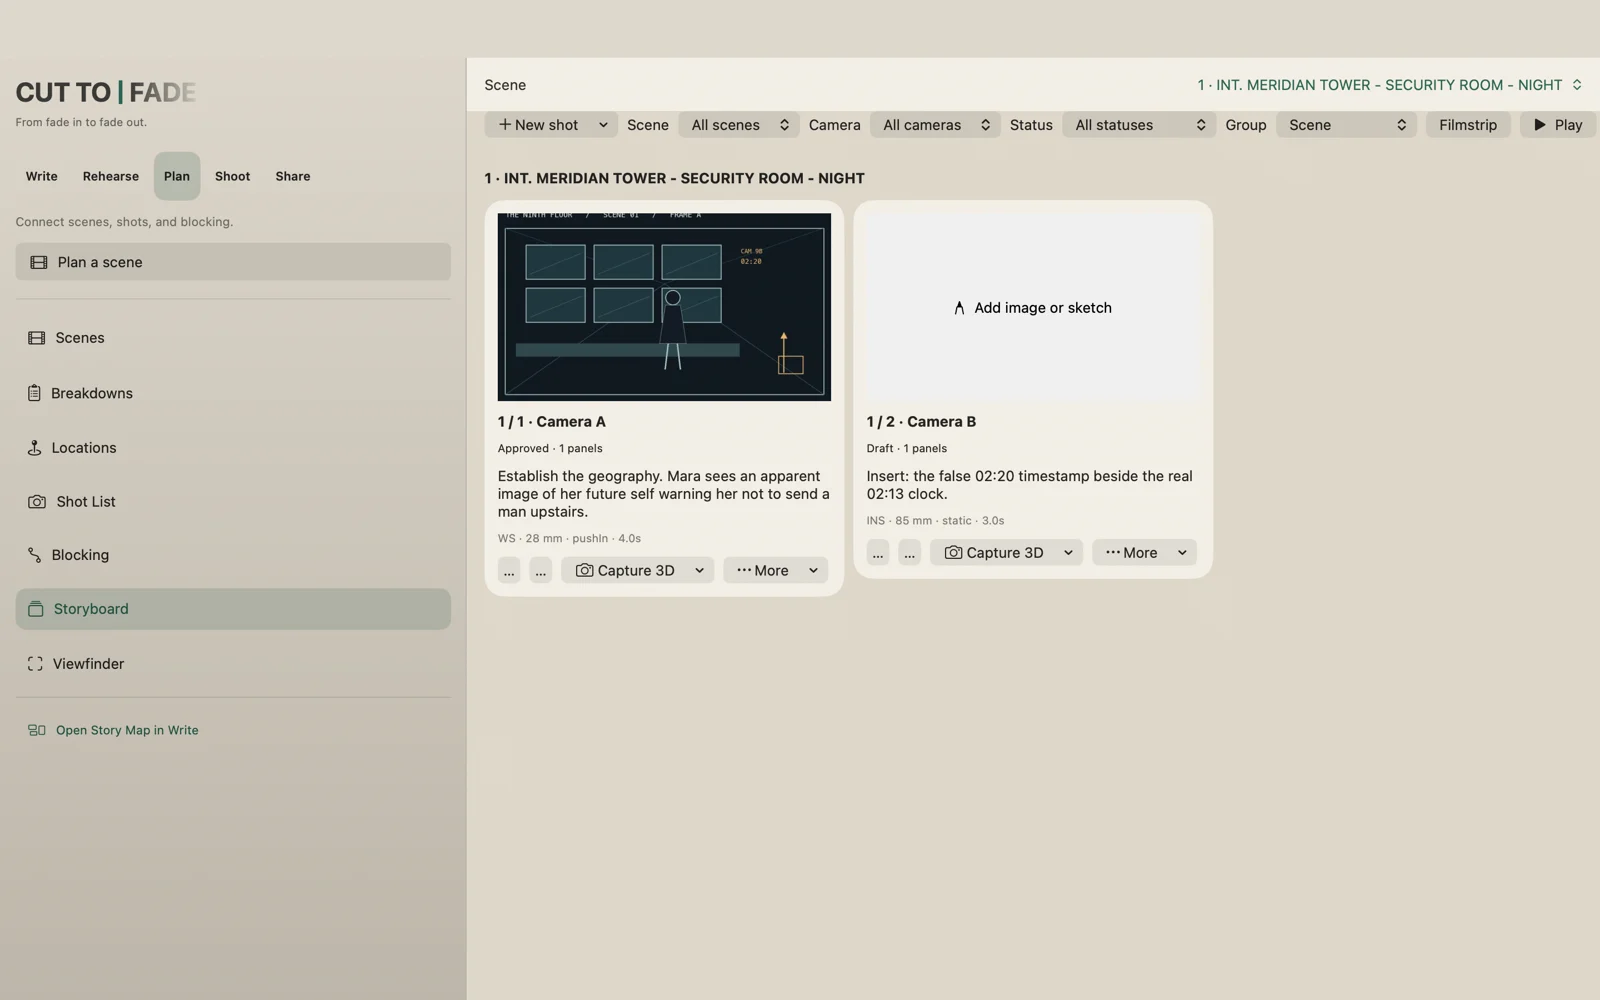
Extend the sequence
Choose Edit sequence, then Add panel for another stage of the shot. Name the panels to distinguish a movement, end position or detail.
Keep another option
Mark a panel Alternative to exclude it from the animatic while keeping it for comparison. Make preferred composition selects the favored frame.
Refresh a capture
Capture 3D can update the start panel or a named sequence panel. Review a Blocking changed notice before relying on an old composition.
Track the review
Use status and notes to record the board's progress. Save your changes before leaving the sequence editor.
Back to contentsPLAN
Play and share the board
Check timing and send a useful review copy.
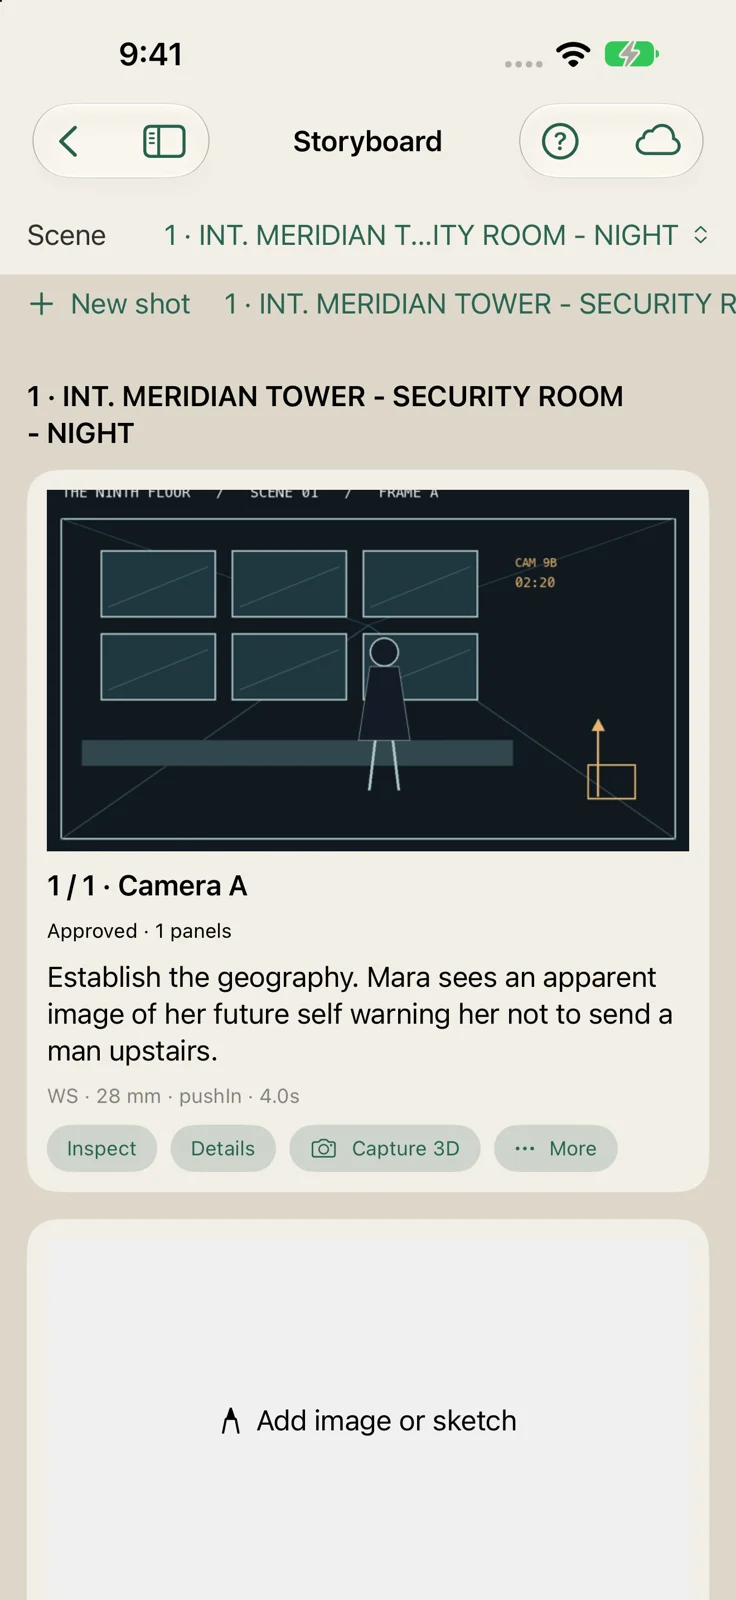
Preview the animatic
Choose Play in Storyboard. Use Previous, Next, Restart and the position control to inspect the sequence and timing.
Hear the dialogue
Enable Read panel dialogue when spoken panel text helps the review. Pause to examine an individual composition.
Choose the PDF
Export a Contact sheet PDF with 1, 2, 4 or 6 panels per page, a Presentation PDF, or a Production PDF + blocking.
Send a portable review
Portable review (HTML) creates a shareable review file with its own animatic. Open the export and check the content before distributing it.
Back to contentsPLAN
Break down the production
Turn scene details into department lists.
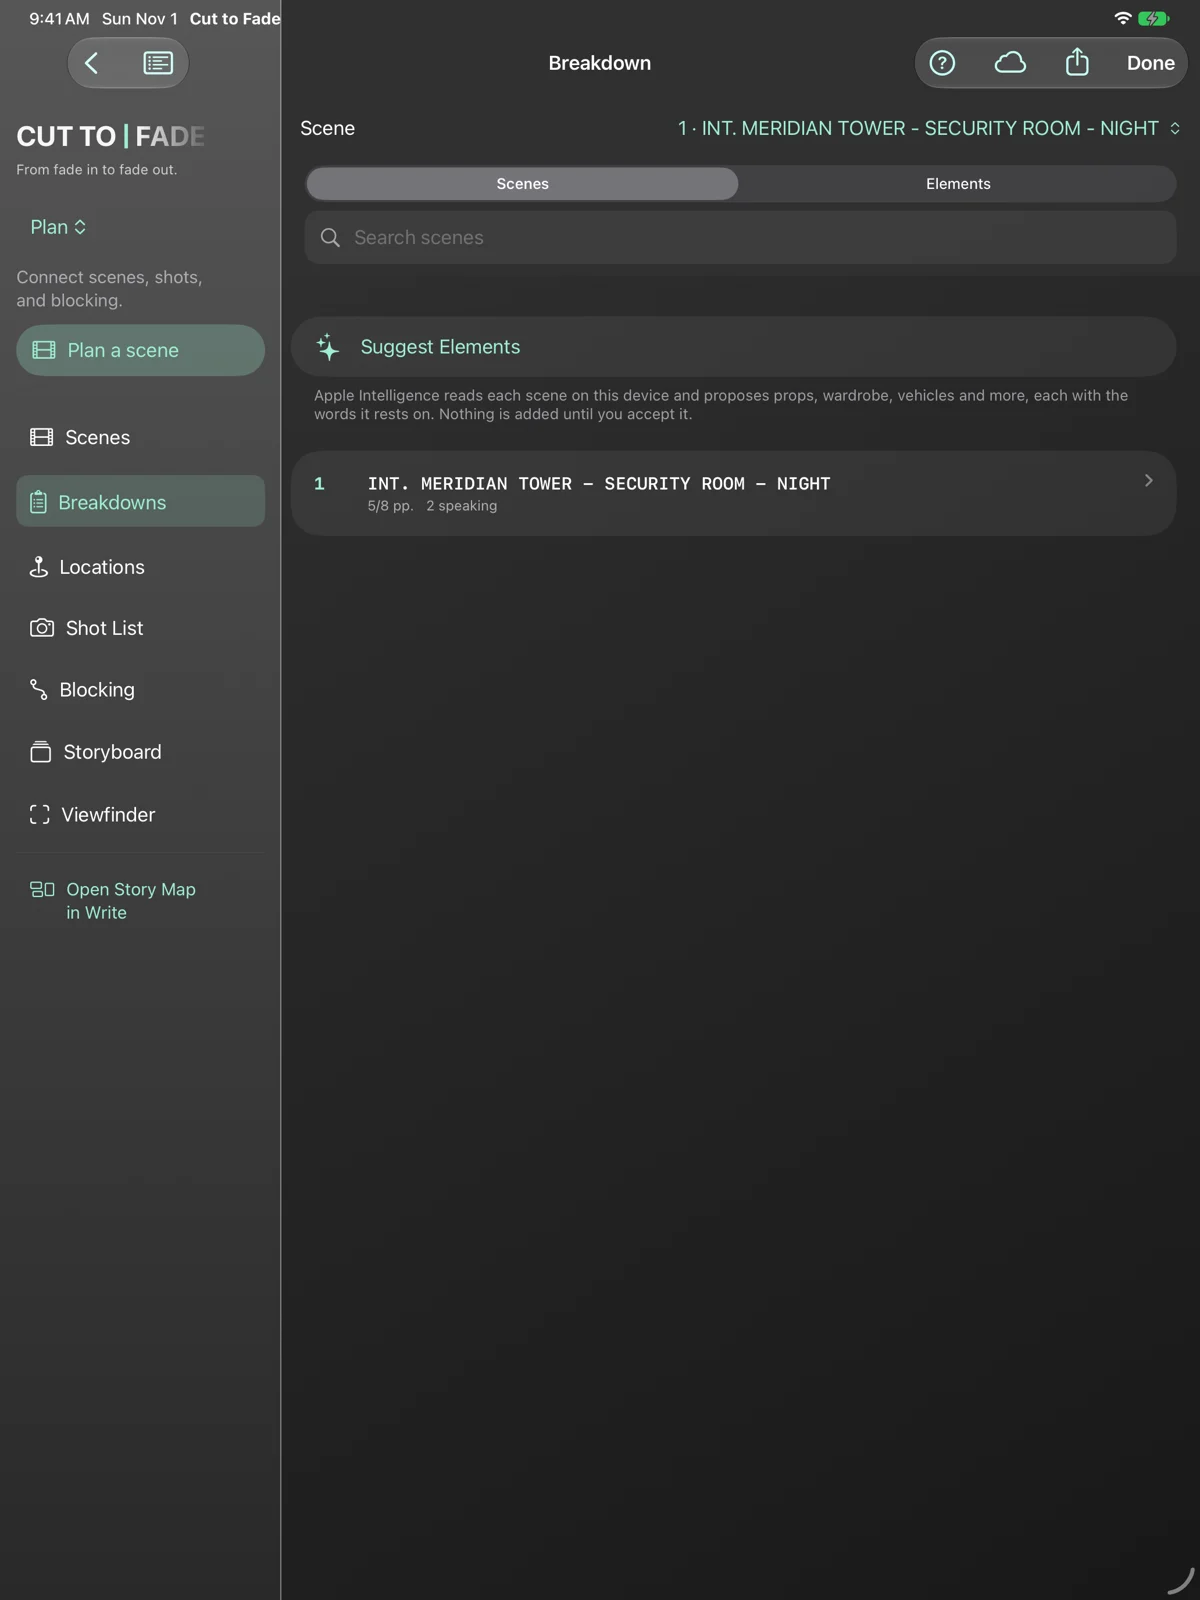
Tag the scene
Choose Plan > Breakdowns. Add props, wardrobe, set dressing, vehicles and other elements by category. Cast and script locations come from the screenplay.
Check each department
Review what must be sourced or prepared and export the relevant lists. Recheck them after a rewrite.
Scout the location
In Plan > Locations, add the real address, notes and reference photos, then assign matching scene headings.
Keep practical details
Record access and shooting information with the location. Verify it before creating the call sheet or crew handoff.
Back to contentsPLAN
Frame it on location
Scout with the iPhone or iPad camera.
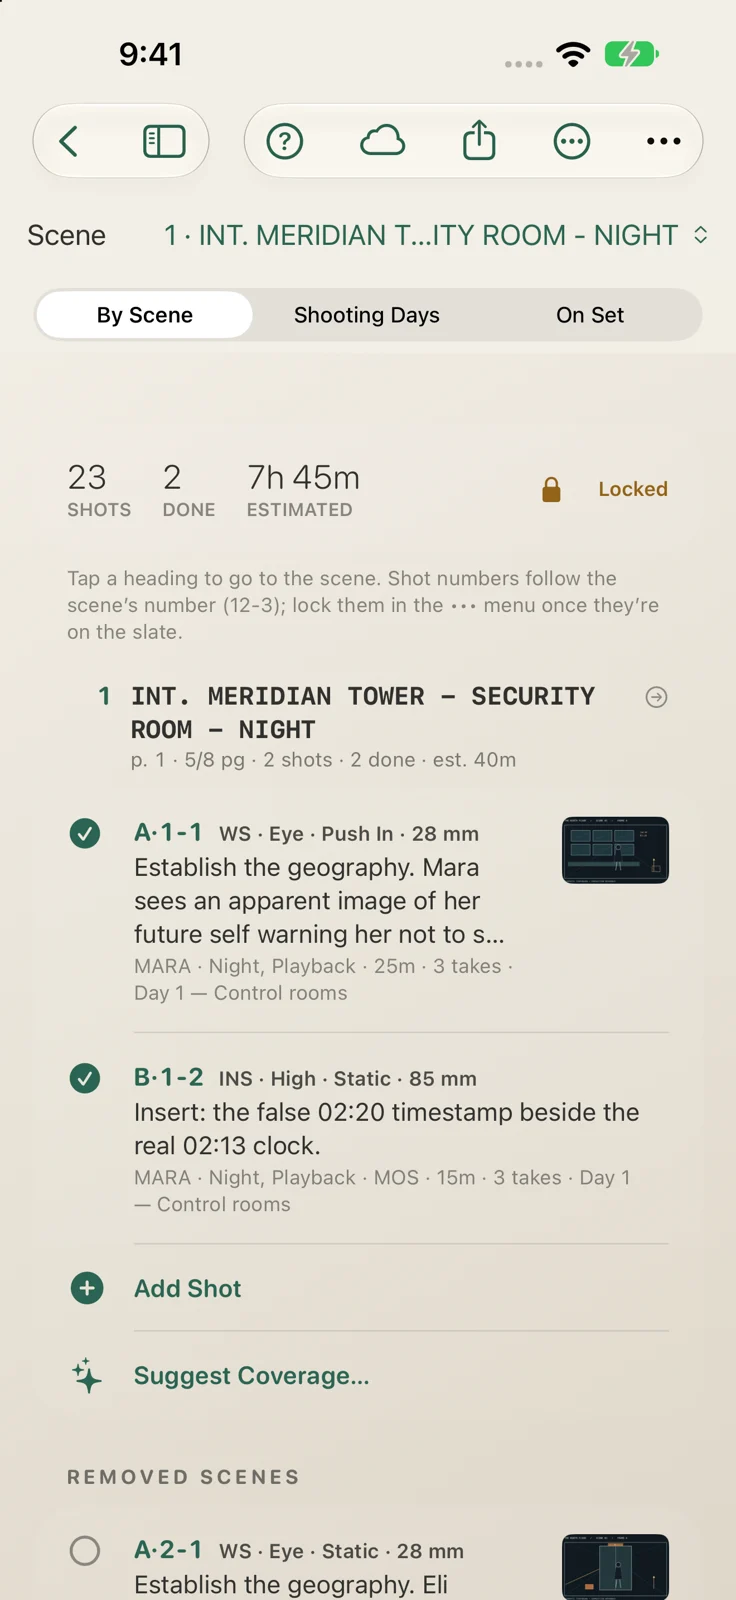
Open Viewfinder
Open it from a shot in Shot List. The standalone Plan > Viewfinder is available with Pro. The image here shows the shot list that leads into it.
Choose the setup
Select camera, lens and aspect ratio. Grid, safe-area and level guides help compose the frame. Save a reference still to the shot.
Compare and refine
Use available A/B setups and camera controls to compare framing. Pro adds production tools such as anamorphic previews, depth-of-field guides, looks and recorded moves.
Check on the camera
Use the preview to communicate intent, then verify the result with the production camera and lens.
Back to contentsPLAN
Block the scene
Place the cast, cameras and set pieces.
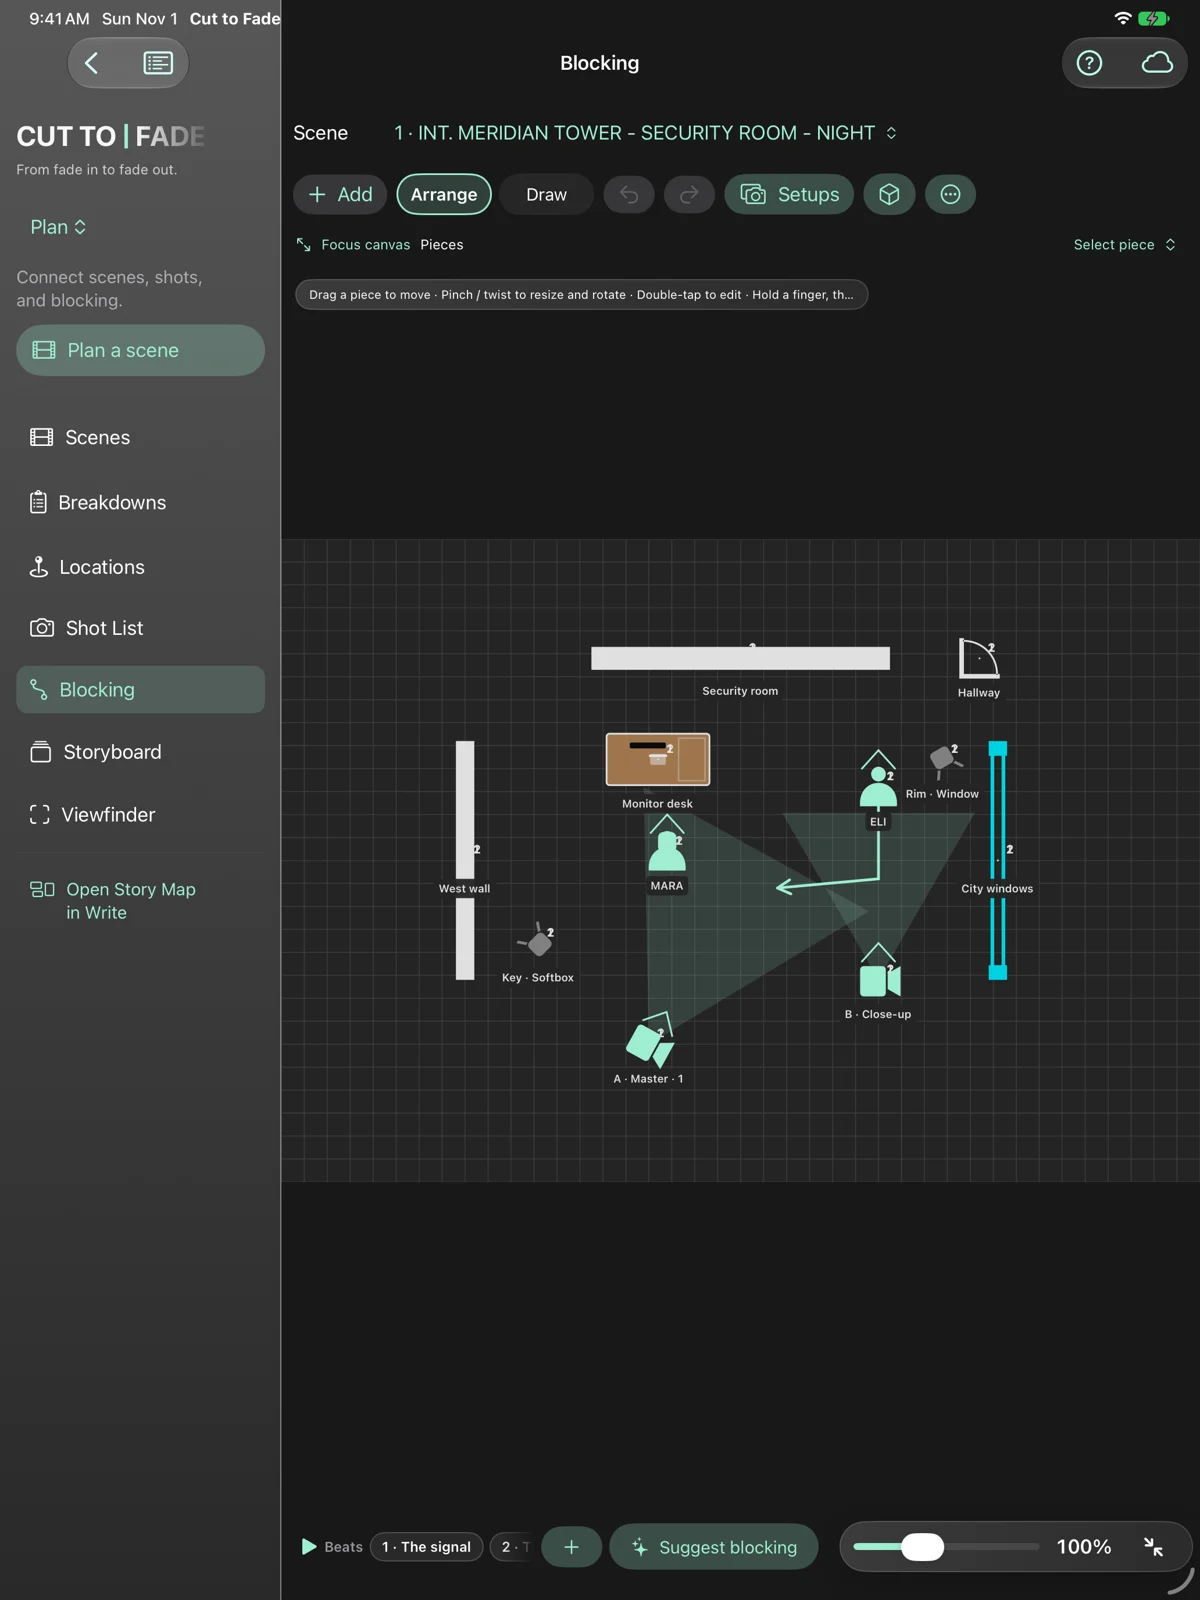
Build the space
Choose Plan > Blocking and select a scene. Add actors, cameras, walls, doors, windows, furniture or props. Place cast adds the scene's characters.
Move a piece
Tap to select and drag to move. Pinch a selected piece to resize it; rotate with two fingers. Tap an overlap again to reach a piece beneath it.
Move the view
Use Pan to move the canvas. Center canvas brings it back. Focus canvas hides tools; Show tools restores them.
Inspect the result
Select Edit for precise settings, or View in 3D to inspect the staging. Link a camera to a shot when planning coverage.
Back to contentsPLAN
Dress and direct the cast
Make the staging easier to read in 3D.
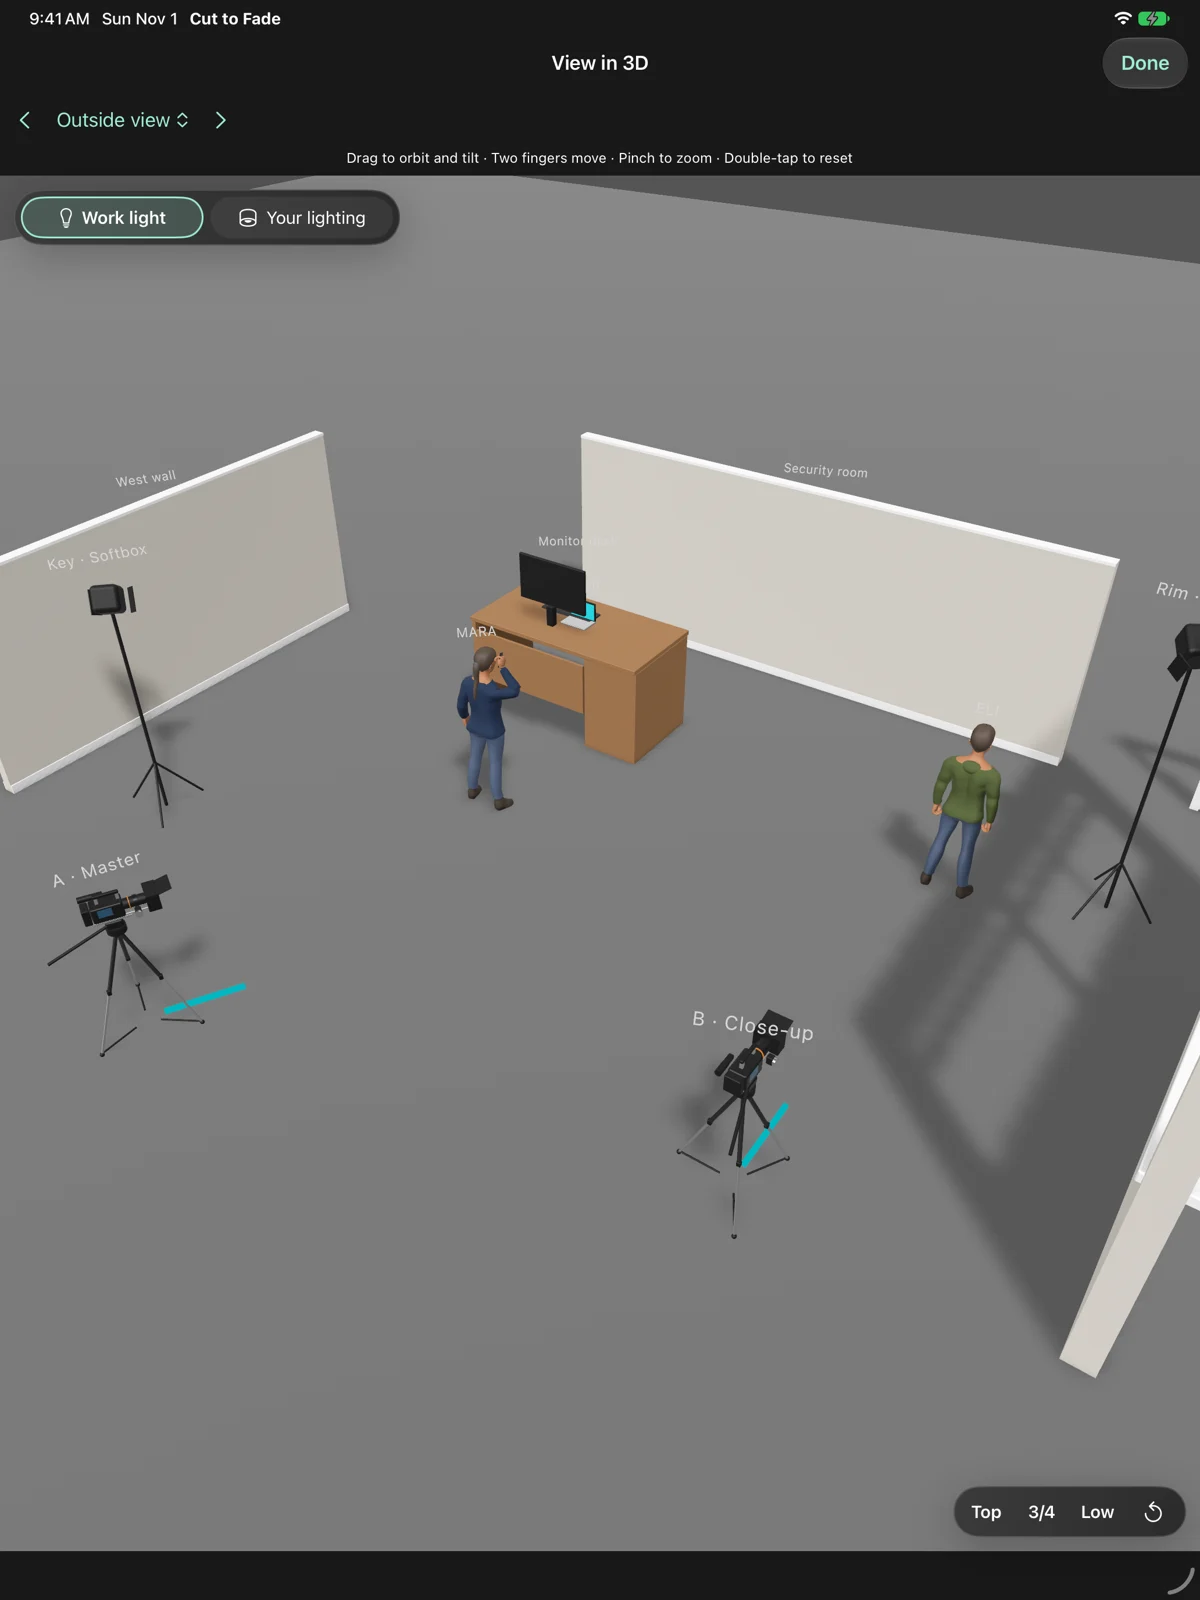
Choose an actor
Select a character in Blocking, then Edit. Placement contains appearance, age group, skin tone, clothing and clothing color.
Build the look
Choose hair, hat, glasses, facial hair, neckwear and bag. Headphones, face mask and other accessories can clarify the role.
Set the performance
Choose Pose and Hands for sitting, kneeling, floor positions and gestures. Expression and Head direction help show attention without turning the whole body.
Aim the eyeline
Look toward another piece to establish an eyeline. Seated vehicle occupants keep their bodies facing the vehicle while turning their heads.
Back to contentsPLAN
Supports, seats and vehicles
Keep actors and props attached to what carries them.
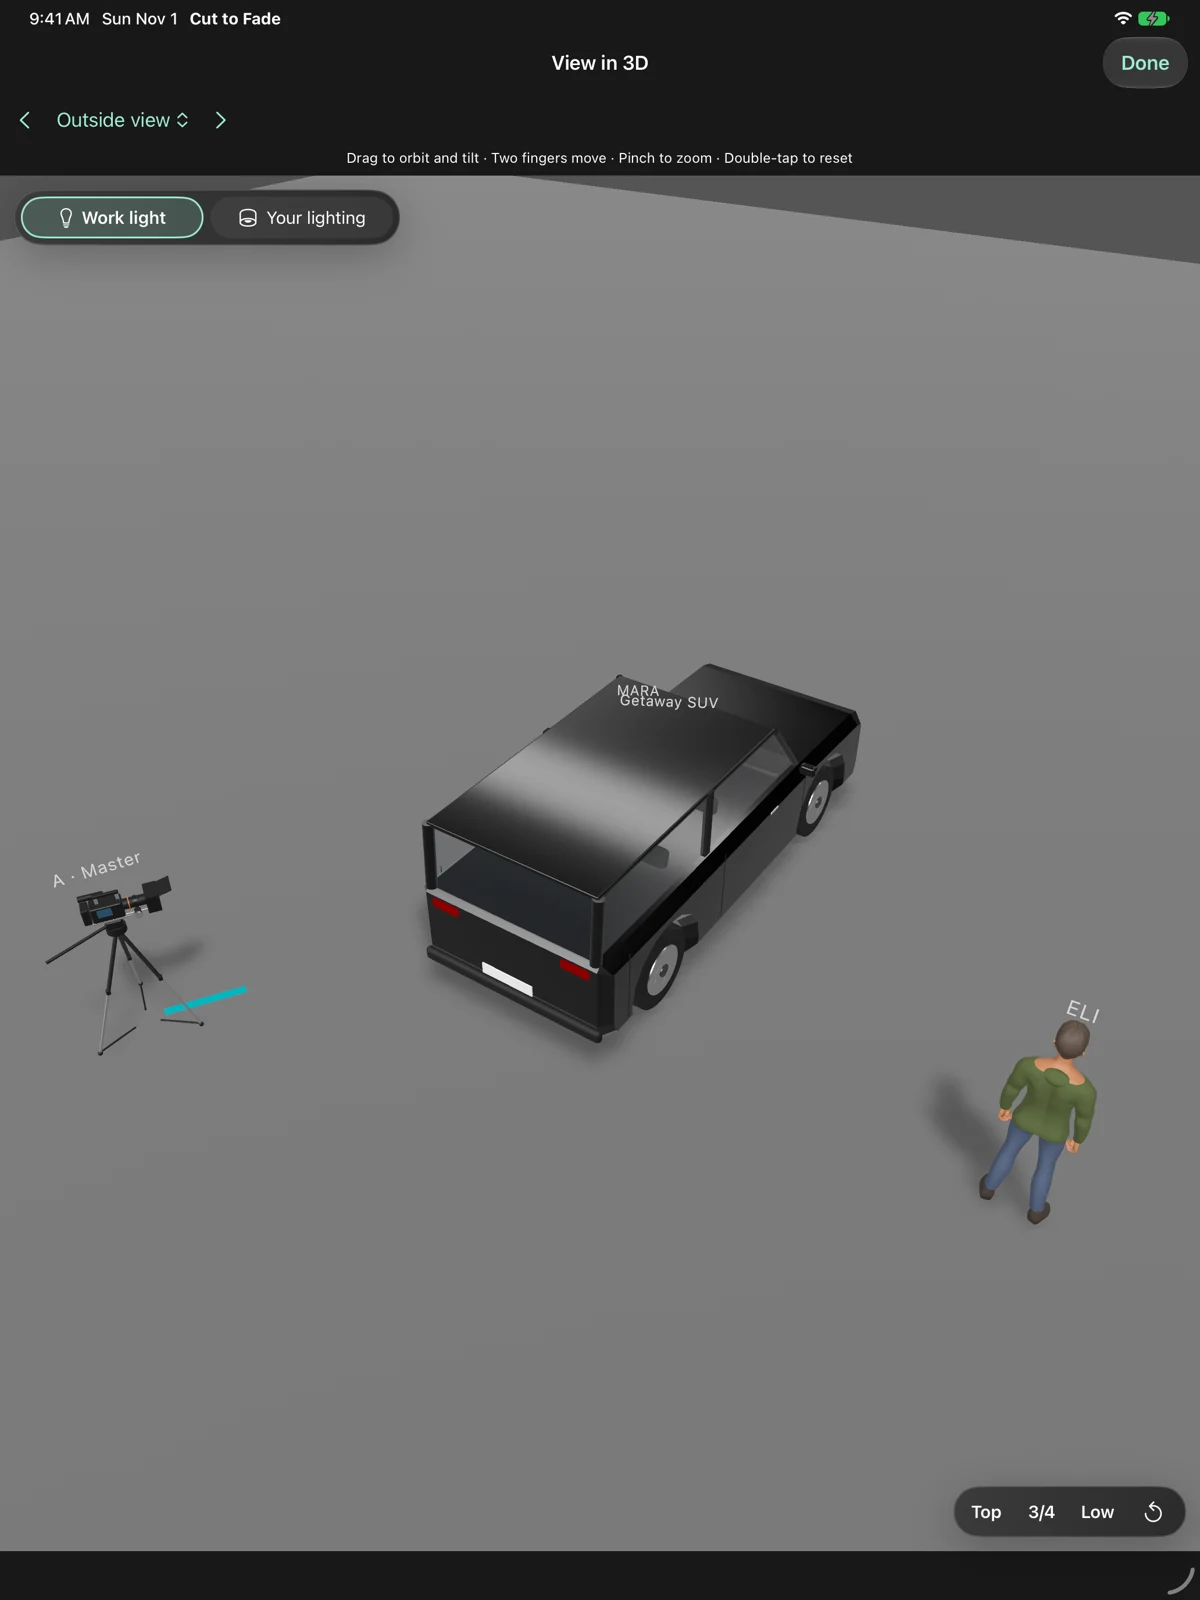
Rest on a support
Select a piece, choose Edit > Placement > Supported by, and pick its support. Base height sets how high the piece sits.
Put an actor in a vehicle
Add the vehicle, then select the actor and choose Placement > In a vehicle > Seat. Occupied seats are unavailable.
Move the arrangement
Supported pieces follow their support. Vehicle occupants follow the vehicle's position and facing, keeping the seating arrangement together.
Step away
Choose Independent / floor or move a rider clear of its support. Taking an actor out of a vehicle puts them beside it.
Back to contentsPLAN
Show how the scene moves
Beats describe action; setups preserve alternatives.
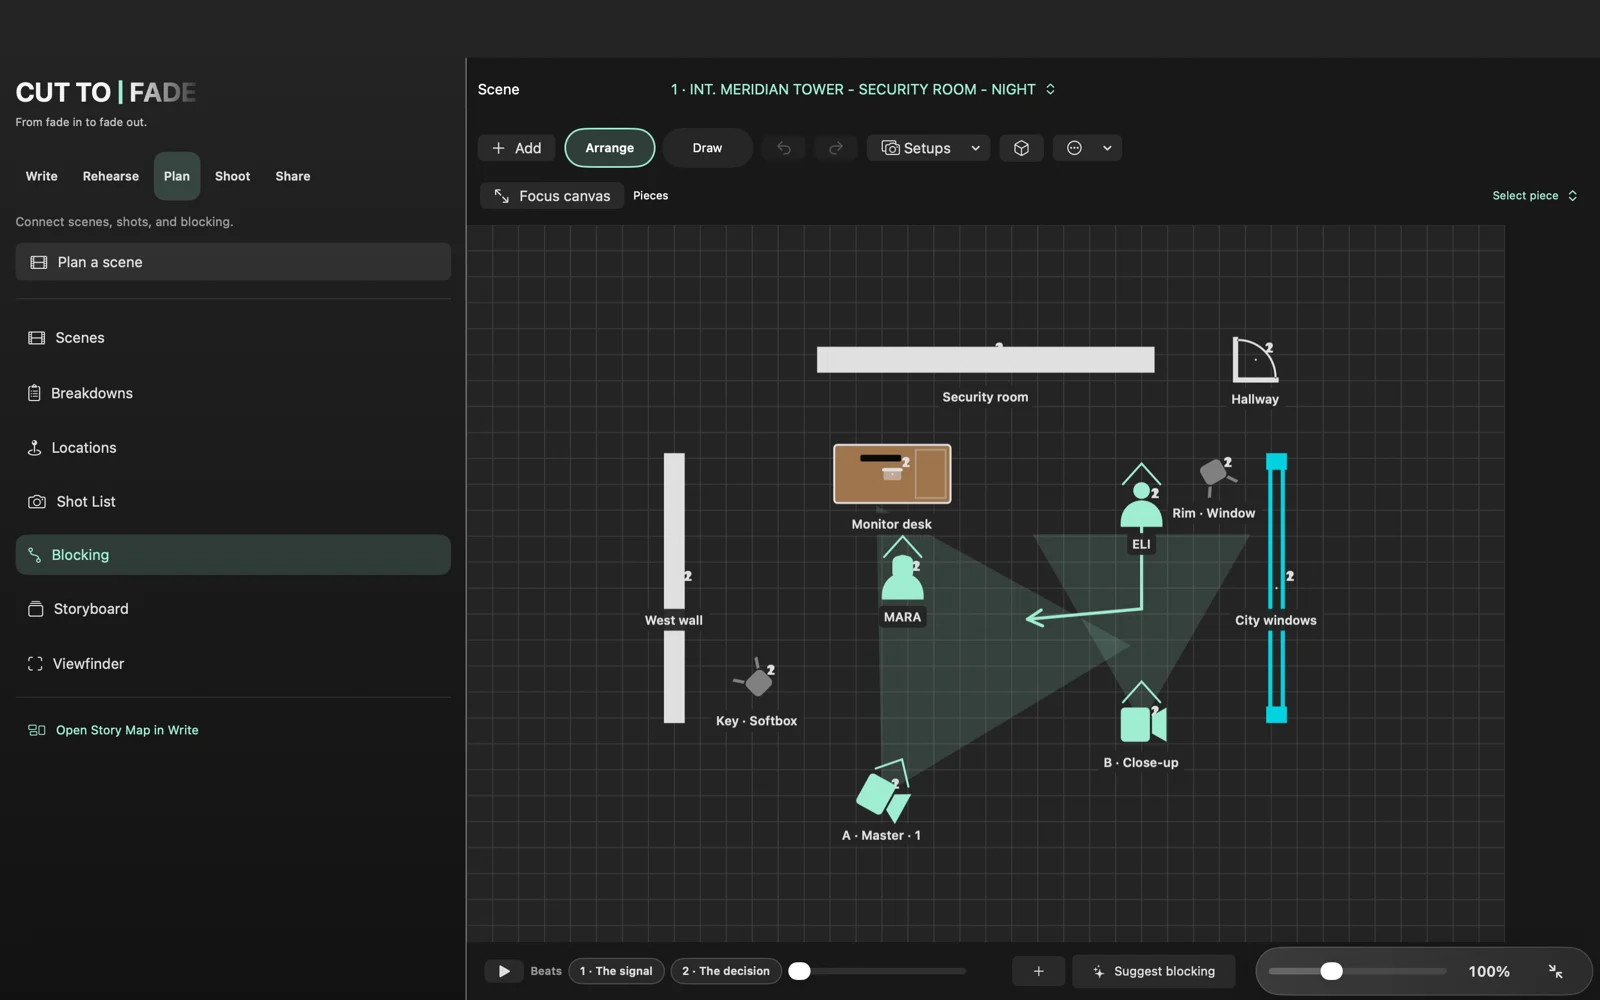
Record the beats
Build the first arrangement and add a beat. Move the cast and pieces, then add later beats for the action you want to show.
Set the timing
Edit this beat sets move duration, hold and a dialogue or action cue. Curved movement paths help describe movement between positions.
Preview the action
Press Play in the beat strip. Riders follow moving supports. Live returns you to the editable arrangement.
Keep alternatives
Use named setups for alternate coverage. More > Reusable arrangements saves layouts or applies a starter. Scene packet (PDF) gathers the scene's planning views.
Back to contentsPLAN
Bring in the room
Use a scan or a floor plan as a starting point.
Scan the location
In Blocking, open More > Scan Location on a supported LiDAR iPhone or iPad. Follow the scan interface to capture the room.
Review the furniture
Imported pieces use likely furniture types and facing. The What it is picker offers Similar alternatives and grouped categories for corrections.
Check supports and direction
Review beds, storage, tables and TVs in the plan and 3D view. Confirm that each piece faces the intended direction and rests at the right height.
Use a drawing instead
More > Floor plan from Photos or Floor plan from Files adds an existing reference. Review the plan before staging the cast.
Back to contentsPLAN
Explore the light and lens
Plan the setup, then verify it on location.
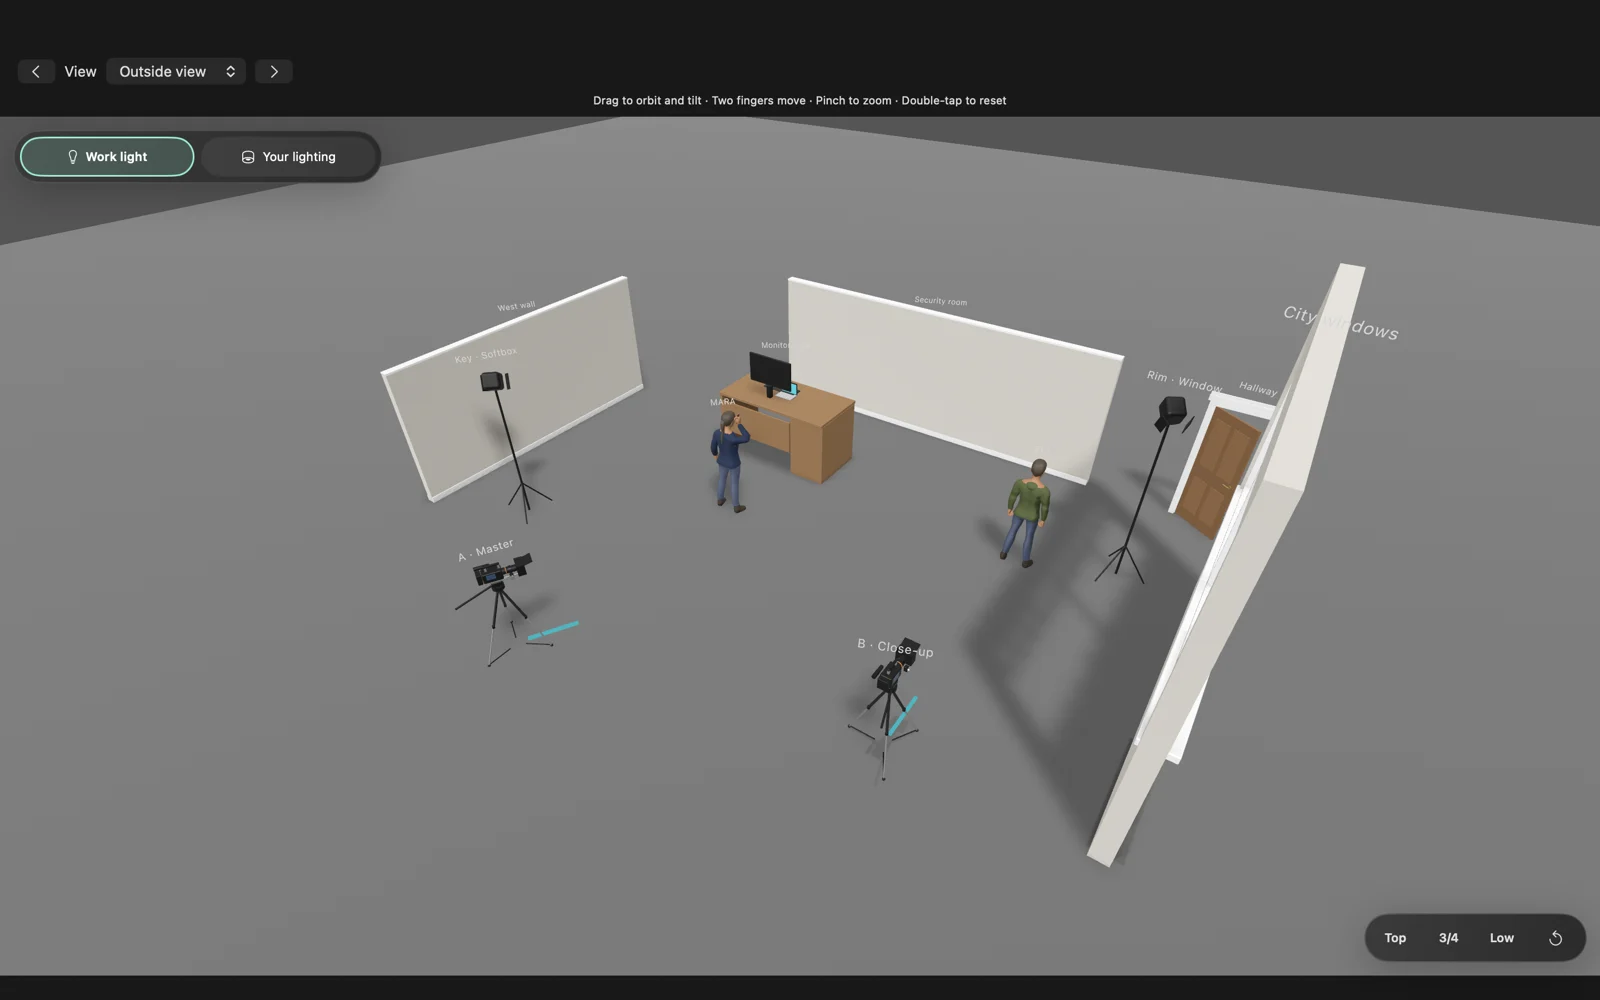
Set the light
Add a light and edit fixture, role, power, color temperature, beam, dimmer, height and tilt. Use gels and diffusion to describe the setup.
Choose camera optics
Choose a camera and lens, aperture, focus distance, tilt and Dutch angle. Coverage follows the planned camera and lens settings.
Preview the scene
Inspect the 3D view and camera preview. Your lighting and Sun & Time help explore light direction and the intended look.
Prepare the department
Lighting Plot PDF and circuits organize fixtures and estimated loads. Share the relevant plan in a scene or crew packet.
Back to contentsSHOOT
Build the shooting day
Organize scenes in Shoot > Schedule.
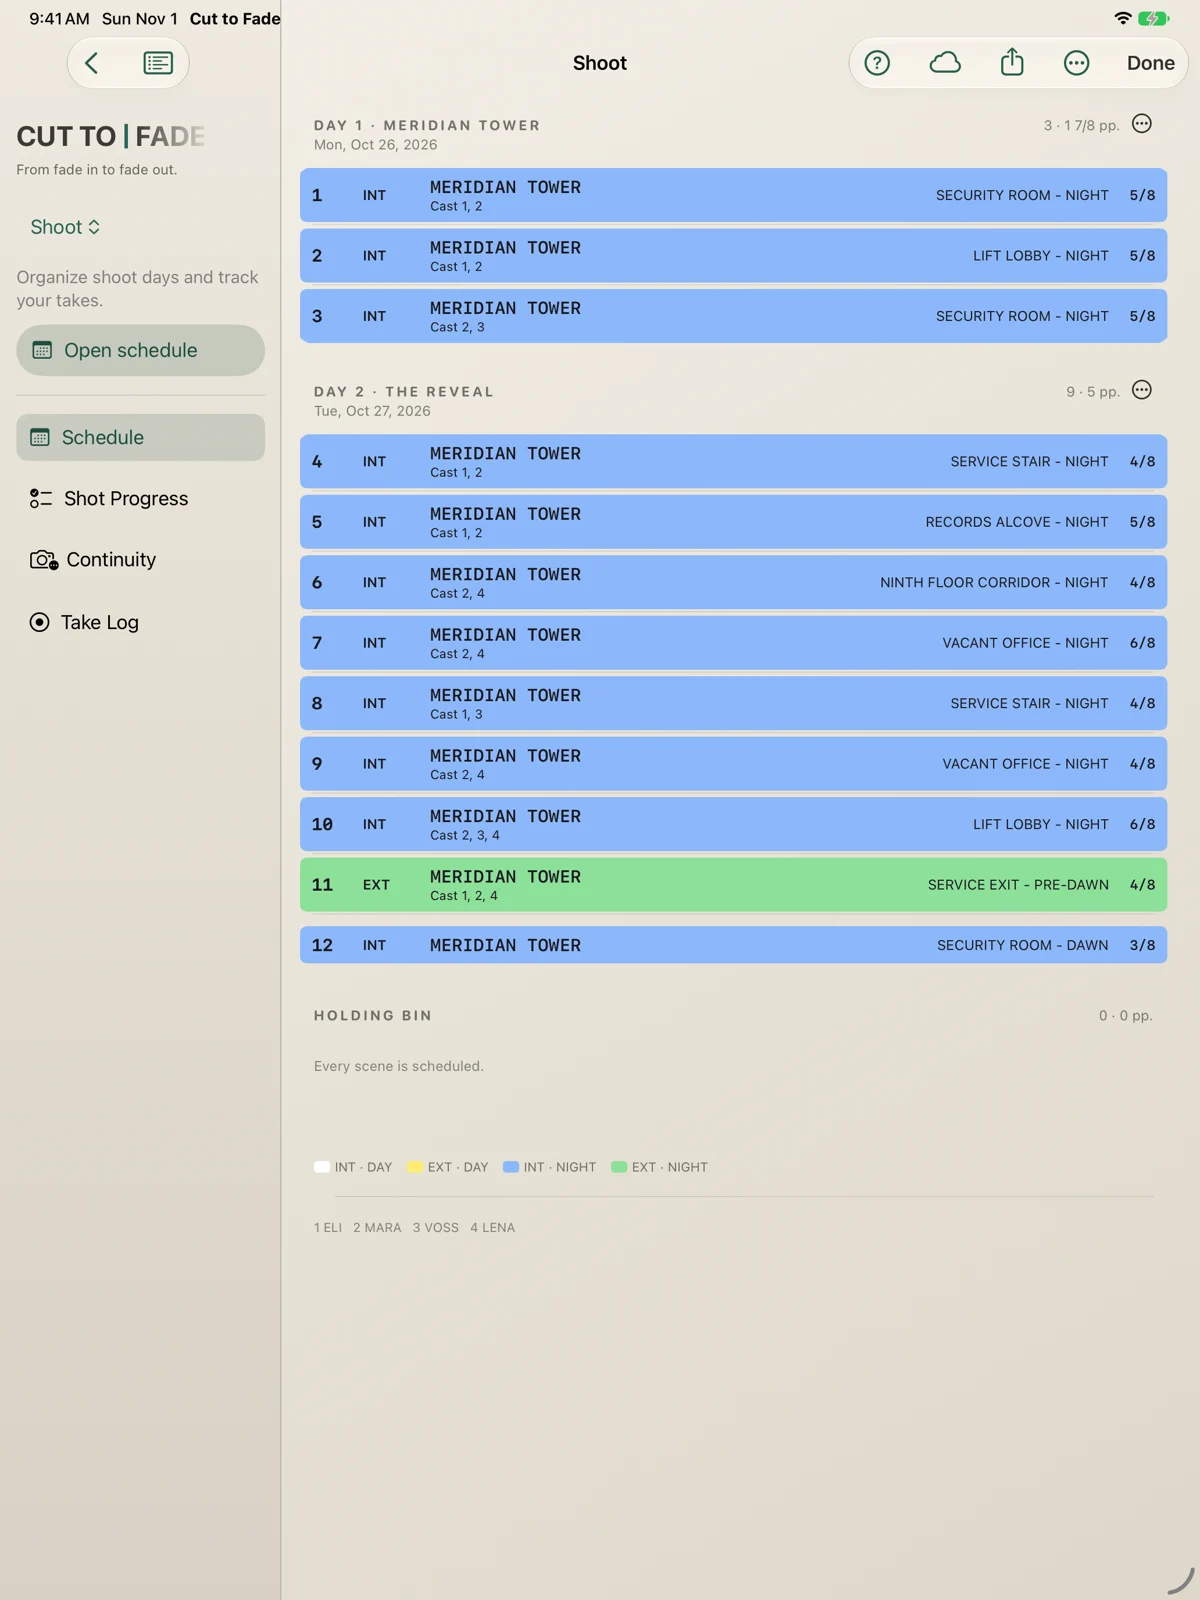
Group the scenes
Place scenes into shoot days and use the holding bin for unassigned work. Strip colors distinguish interior/exterior and time of day.
Add the day details
Set the date, call time, location and notes. Review page totals and the one-line schedule.
Prepare the call sheet
Add cast calls, crew notes, location information and emergency details. Weather is entered by you; sunrise and sunset use location coordinates.
Check the handoff
Verify every date, address, call and contact before exporting the call sheet.
Back to contentsSHOOT
Keep track on set
Progress, continuity and takes stay with the project.
Track coverage
Shoot > Shot Progress tracks Planned, Ready, Shot and Needs pickup. Add clear pickup notes for the next crew member.
Record continuity
Shoot > Continuity holds notes by department and reference photos showing what must match.
Log the performance
Shoot > Take Log records takes, performance, sound and editorial notes. Circle the preferred take.
Share the record
Share > Take Export produces a CSV handoff. Check shot labels and notes before sending it to editorial.
Back to contentsSHOOT
Track takes from Apple Watch
Use the wrist controls for the selected shot.
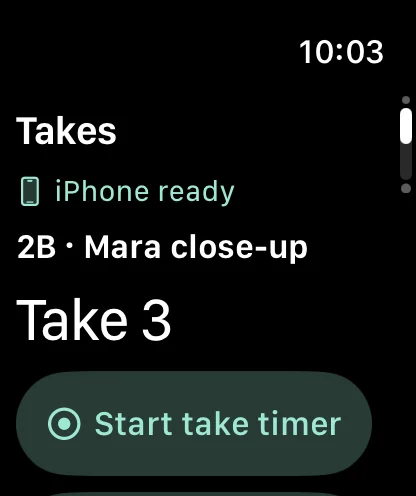
Choose the shot on iPhone
Open Shoot > Shot Progress, choose the shooting day and use Use on Apple Watch on the desired shot.
Time or log a take
On Watch, Start take timer creates the next numbered take. Stop timer saves elapsed seconds in its notes. Log next take creates a take without timing.
Mark the favorite
Circle take toggles the preferred take. Stop a running timer before switching shots.
Read the shooting day
The Shoot Day page shows the selected scene, next setup and scheduled call. Refresh if updates have paused.
Back to contentsSHARE
Export and share the work
Choose the right file for the recipient.
Screenplay exports
Share > Script Export offers PDF, Fountain and Final Draft. Review title page, scene numbering and revision choices before sending.
Sides and crew packets
Share > Sides selects scenes by character or day. Crew Packets gathers relevant screenplay pages and production plans for a department or the full crew. Both require Pro.
Project handoff
Send to Co-Writer exports a .cuttofade project with supported writing, production plans, images and saved natural voices. Review incoming changes when importing another writer's copy.
Keep an archive
Save a separate project package at milestones. On iPhone and iPad, exports use the share sheet; on Mac, choose a destination in the Save panel.
Back to contentsREFERENCE
Across devices, with Free and Pro
Choose the workspace and tools you need.
Free essentials
Two script families, standard writing and exports, Outline, character profiles, basic Three-Act Story Map, three shots per script, system voices, two natural voices and tap-to-continue rehearsal are included.
Pro expands the workflow
One purchase adds unlimited scripts, full Story Map and Shot List, all natural voices, advanced rehearsal, audio export and production tools. Use Restore Purchases with the purchasing account.
Adaptive screens
iPhone uses compact Workspace navigation. iPad and Mac offer more room for tools. iPhone Duo adapts between compact and expanded layouts while keeping your project open.
Hardware-dependent features
Use a supported physical iPhone or iPad for live camera, AR and scanning. Apple Watch works with its paired iPhone. AI and natural voices require supported systems and devices.
Back to contentsREFERENCE
When something needs attention
Find help without losing your work.
A tool moved
Open Workspace or Show tool menu and choose the stage. Story Map is now in Write; visual Storyboard is in Plan. Workflow guide can reopen tools.
Audio or a cue is not ready
Keep the app open while natural speech prepares, or try a system voice. Check microphone permission for Listen mode. Continue remains available.
A change has not synced
Check the iCloud account, connection and cloud status. Preserve an exported copy before resolving a conflict. Avoid deleting the only good copy to force a refresh.
Contact support
Open Settings > Support or visit https://cuttofade.com/support/. Include version, device, operating system, reproduction steps and a screenshot with private information removed.
Back to contentsCARPLAY
CarPlay: take Table Read with you
Listen to your screenplay through a compatible CarPlay system.
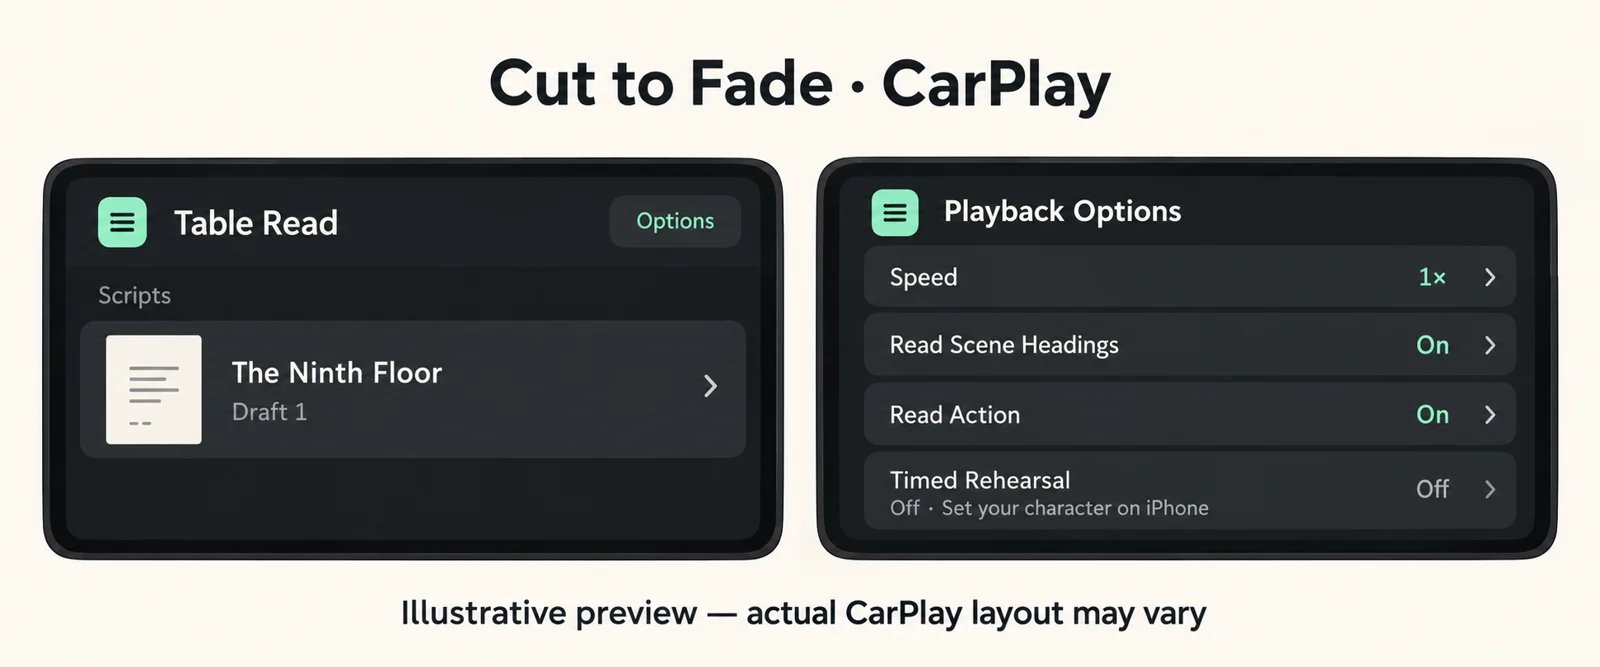
Start on iPhone
Open your script on iPhone, choose the voices and prepare any natural-voice audio before connecting. In CarPlay, open Cut to Fade and choose a script from Table Read.
Listen and navigate
Use Now Playing for transport. Scenes opens scene selection. Playback Options contains reading speed and switches for scene headings and action.
Your library
CarPlay lists available, unarchived scripts from the paired iPhone. A recent script can appear as Resume. Disconnecting CarPlay pauses playback.
Back to contentsCARPLAY SUPPORT
CarPlay rehearsal and troubleshooting
Prepare your role on iPhone, then use timed turns in CarPlay.
Timed rehearsal
With Pro, set your rehearsal character on iPhone. Close the phone Rehearsal screen before starting Table Read in CarPlay, then enable Timed Rehearsal in Playback Options.
Adjust your turn
When timed rehearsal is enabled, Extra Time for My Lines adds 0–10 seconds in two-second steps. Replay Cue repeats the previous exchange; Restart Scene returns to the scene beginning.
No scripts or unavailable library
Open Cut to Fade on the paired iPhone and confirm the script is available and not archived or deleted. Then reopen the CarPlay app.
Playback will not start
Select a script before changing playback options. If prompted, close Rehearsal on iPhone. Check that the script has readable lines and its voices are prepared. CarPlay provides audio playback and timed practice, not microphone recording.
Back to contents